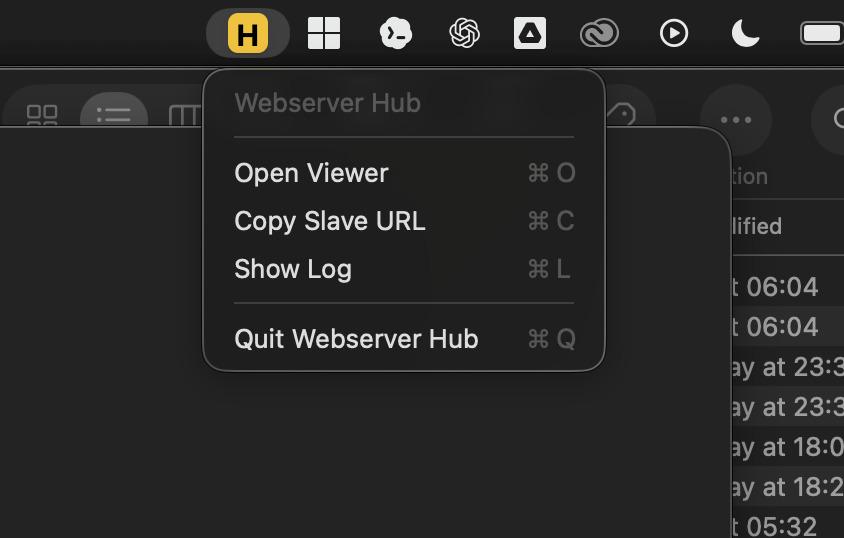
HUBS_
A growing collection of focused tools designed to extend and enhance Current RMS, each Hub solving a specific real world problem across warehouse, prep, transport, admin, and operations.
Every Hub is built from day to day use in live rental environments. Some automate repetitive tasks, others surface critical information faster, and many quietly remove the friction that slows teams down.
Below is a full overview of the Hubs currently available, and what each one does.
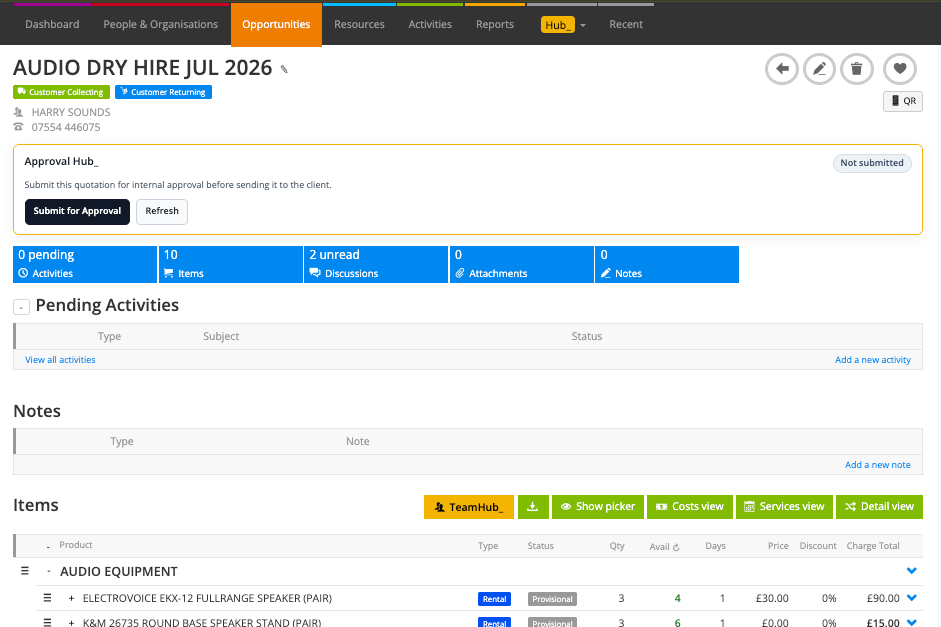
Approval Hub_
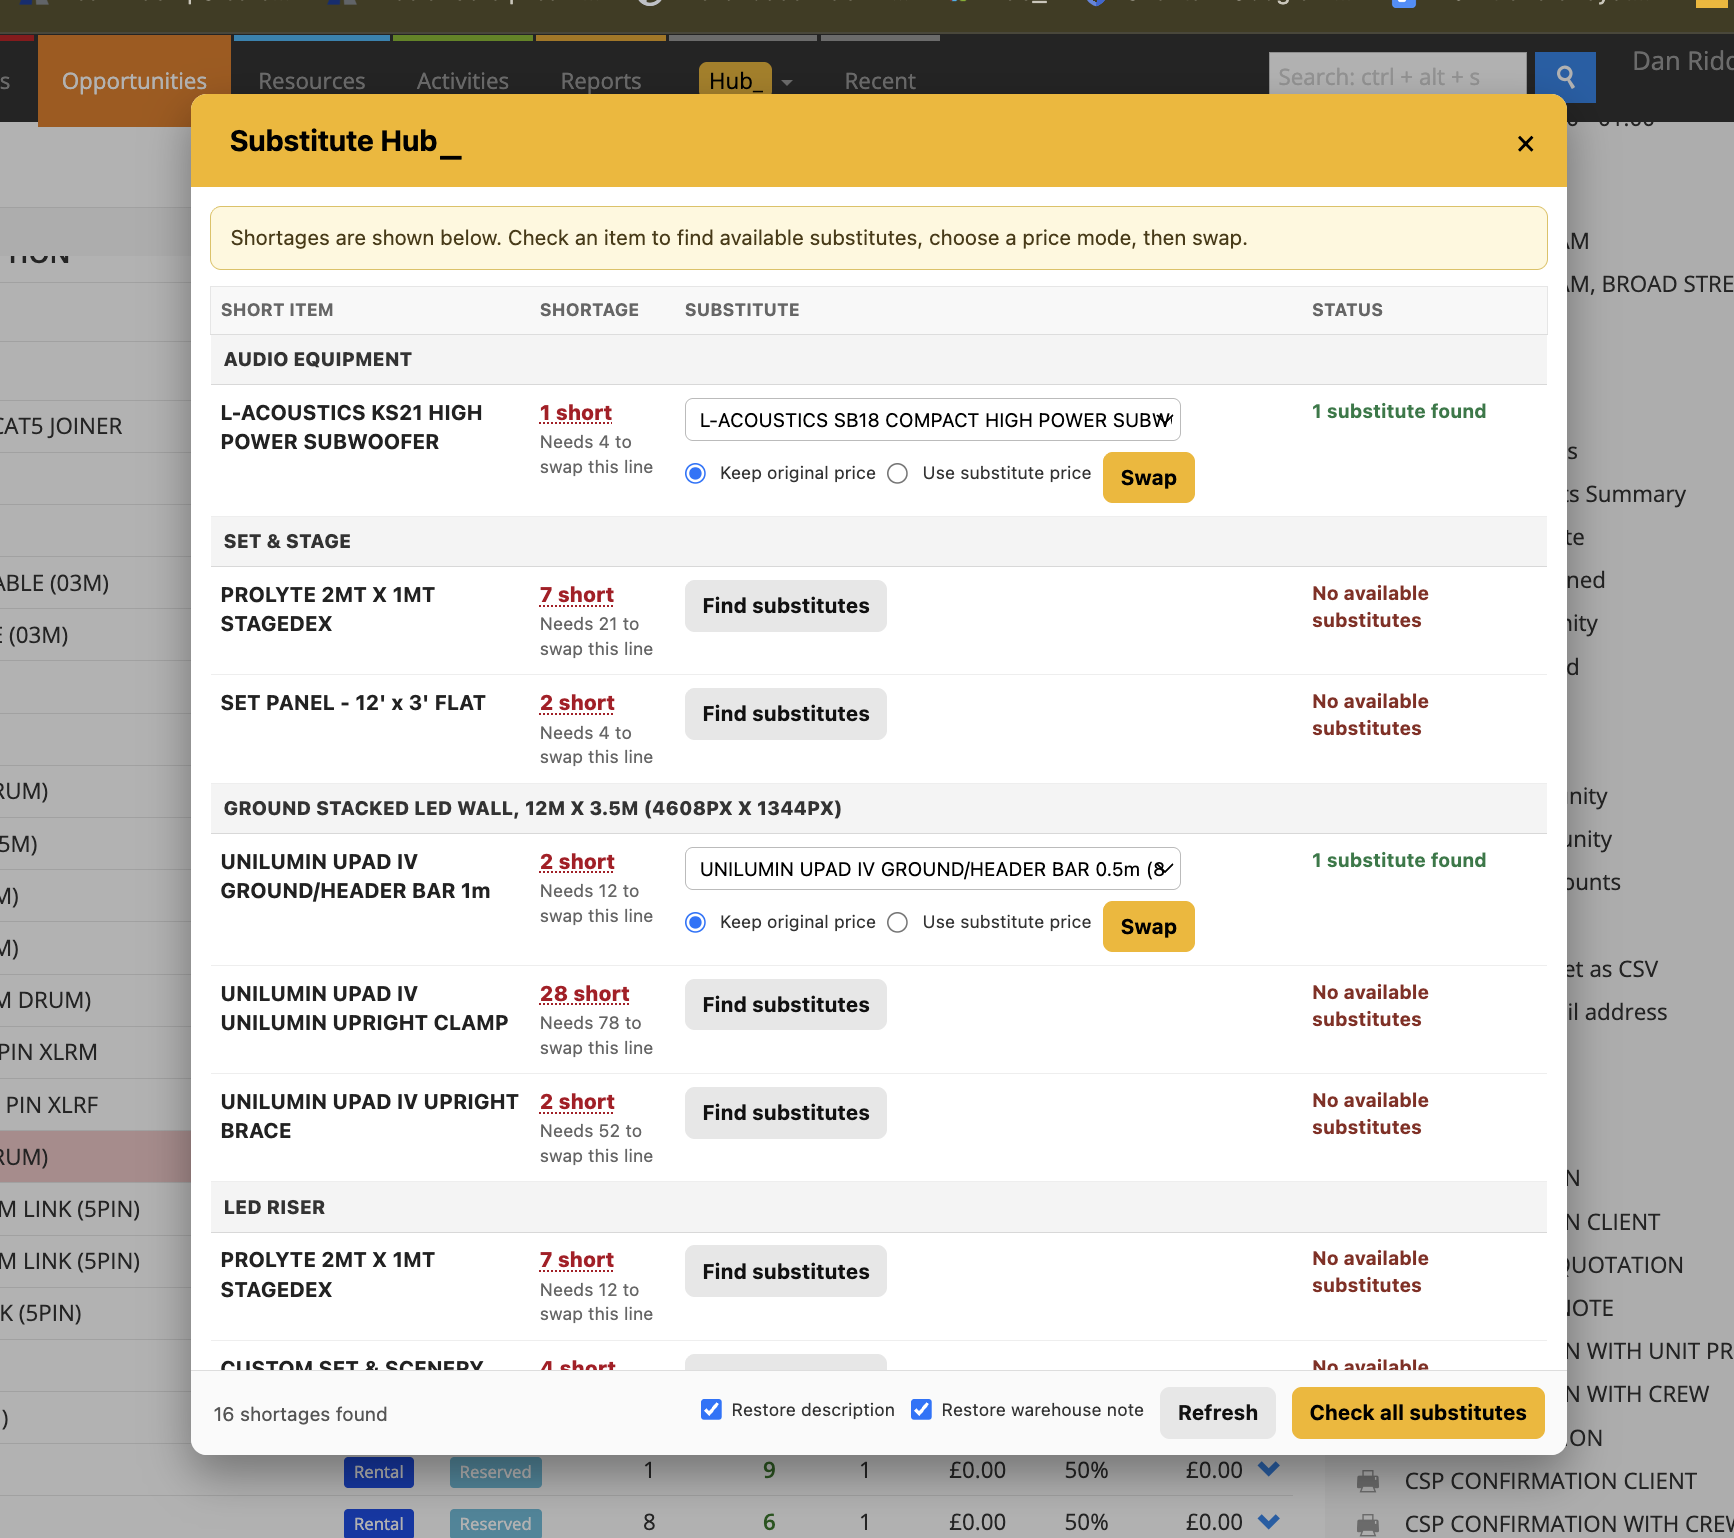
Substitute Hub_
User Hub_
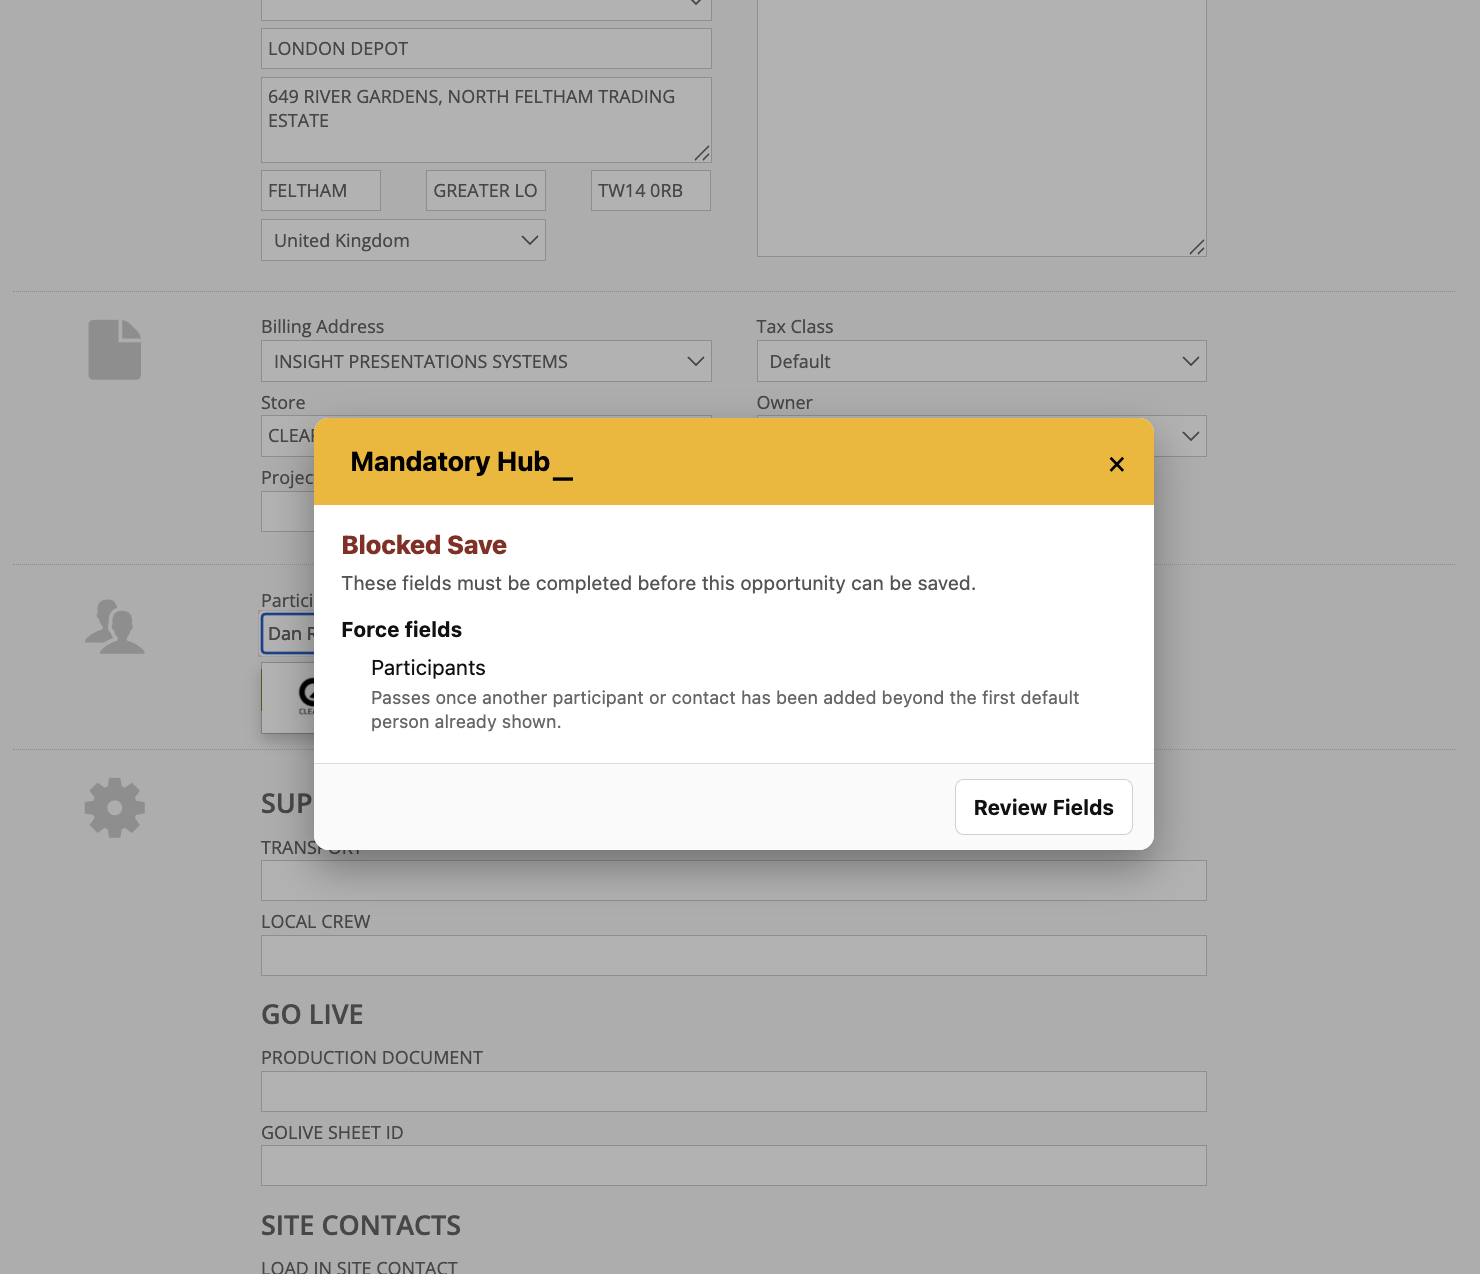
Mandatory Hub_
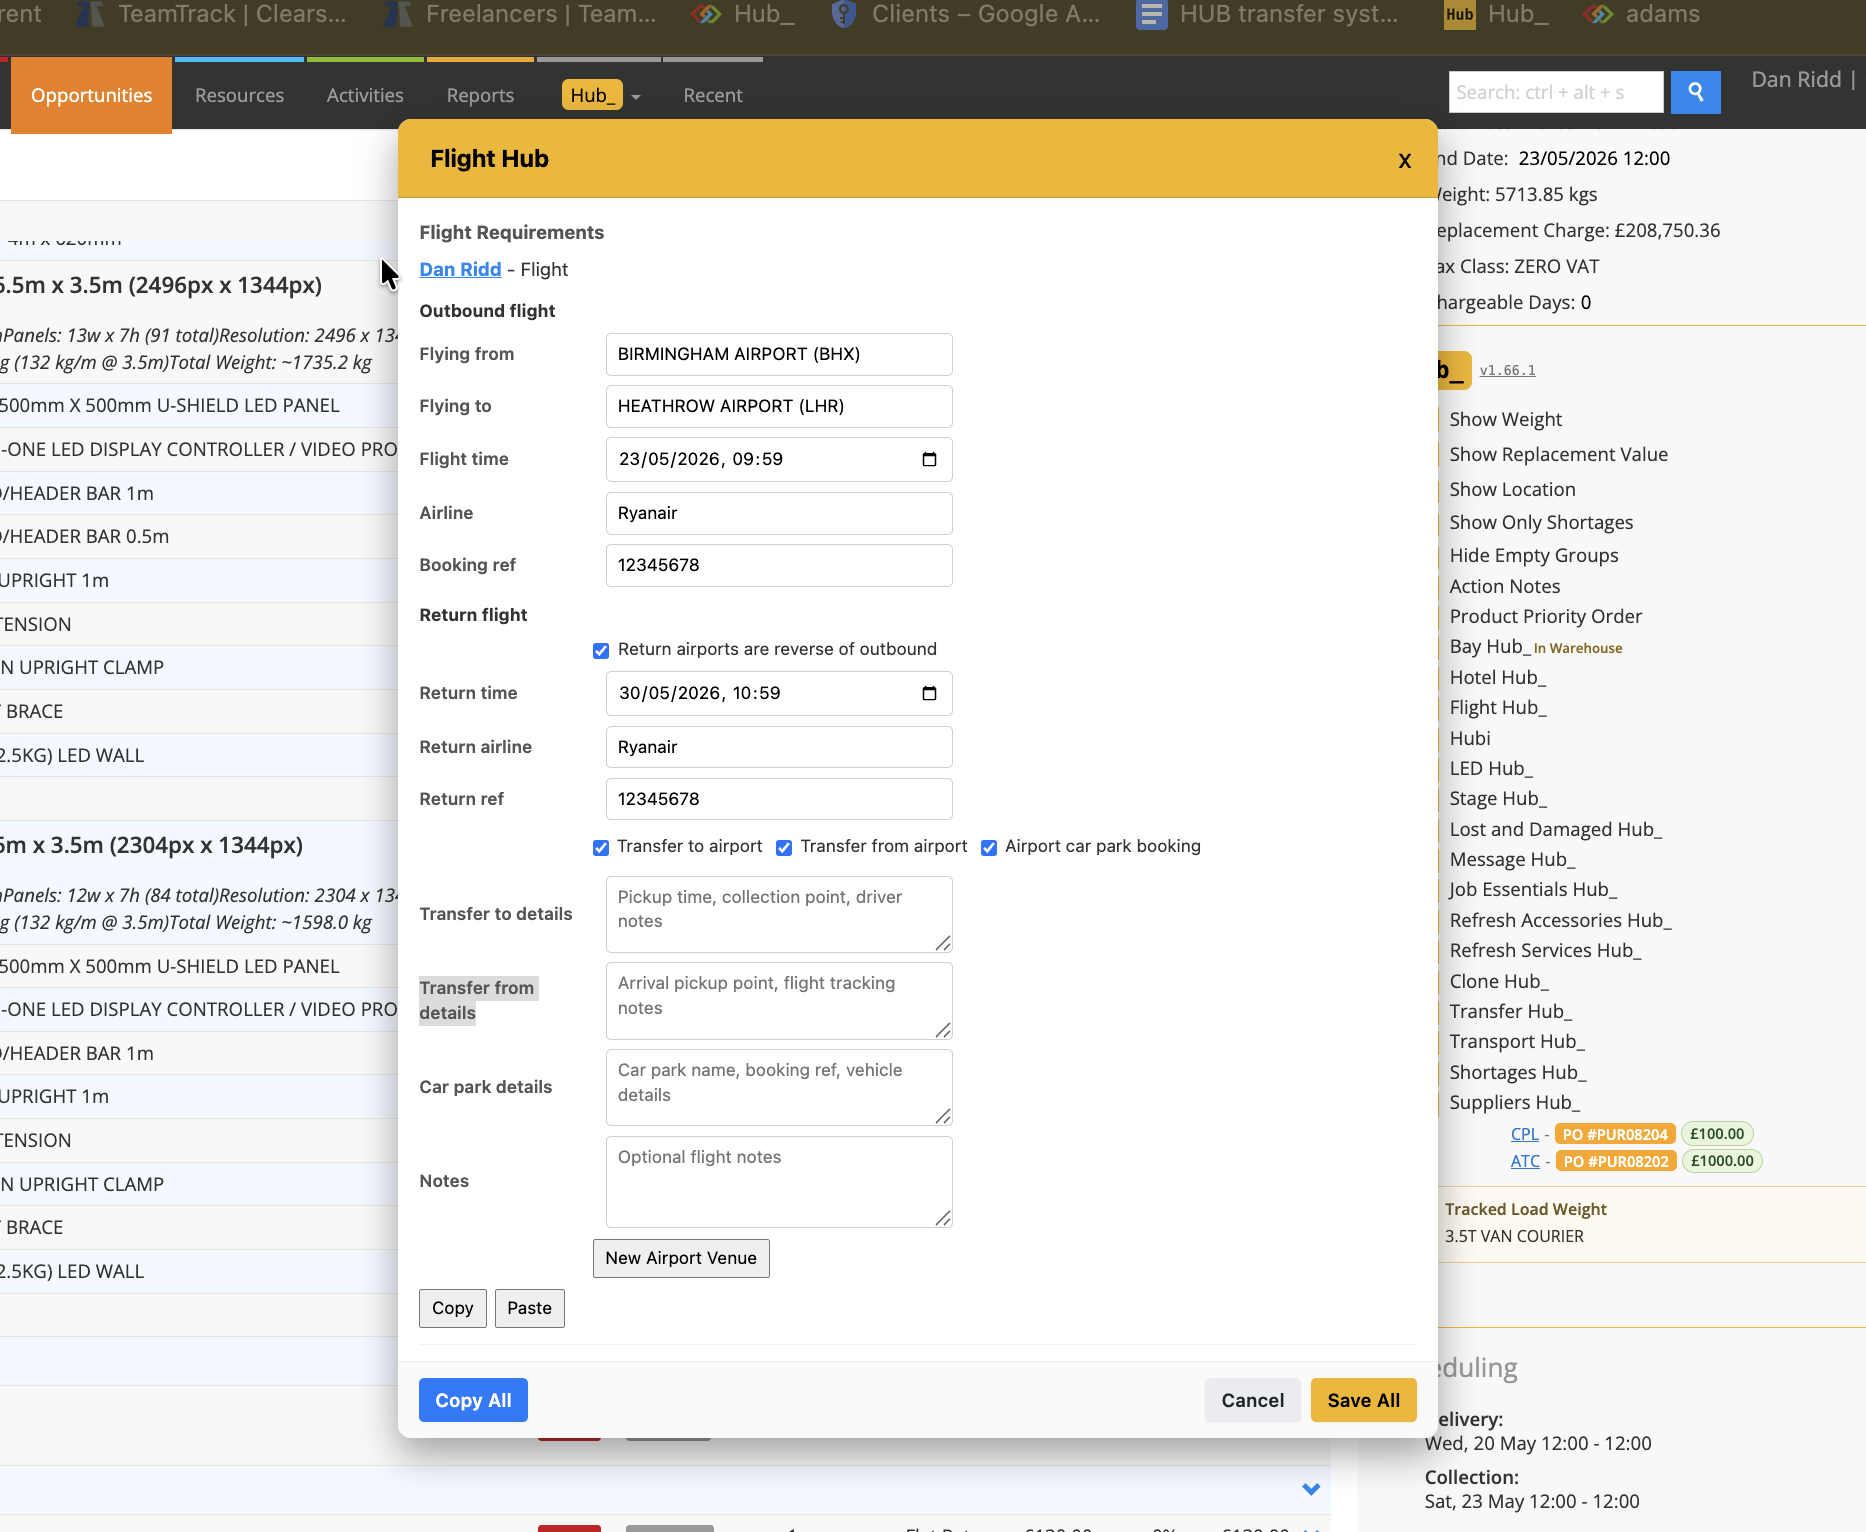
Flight Hub_
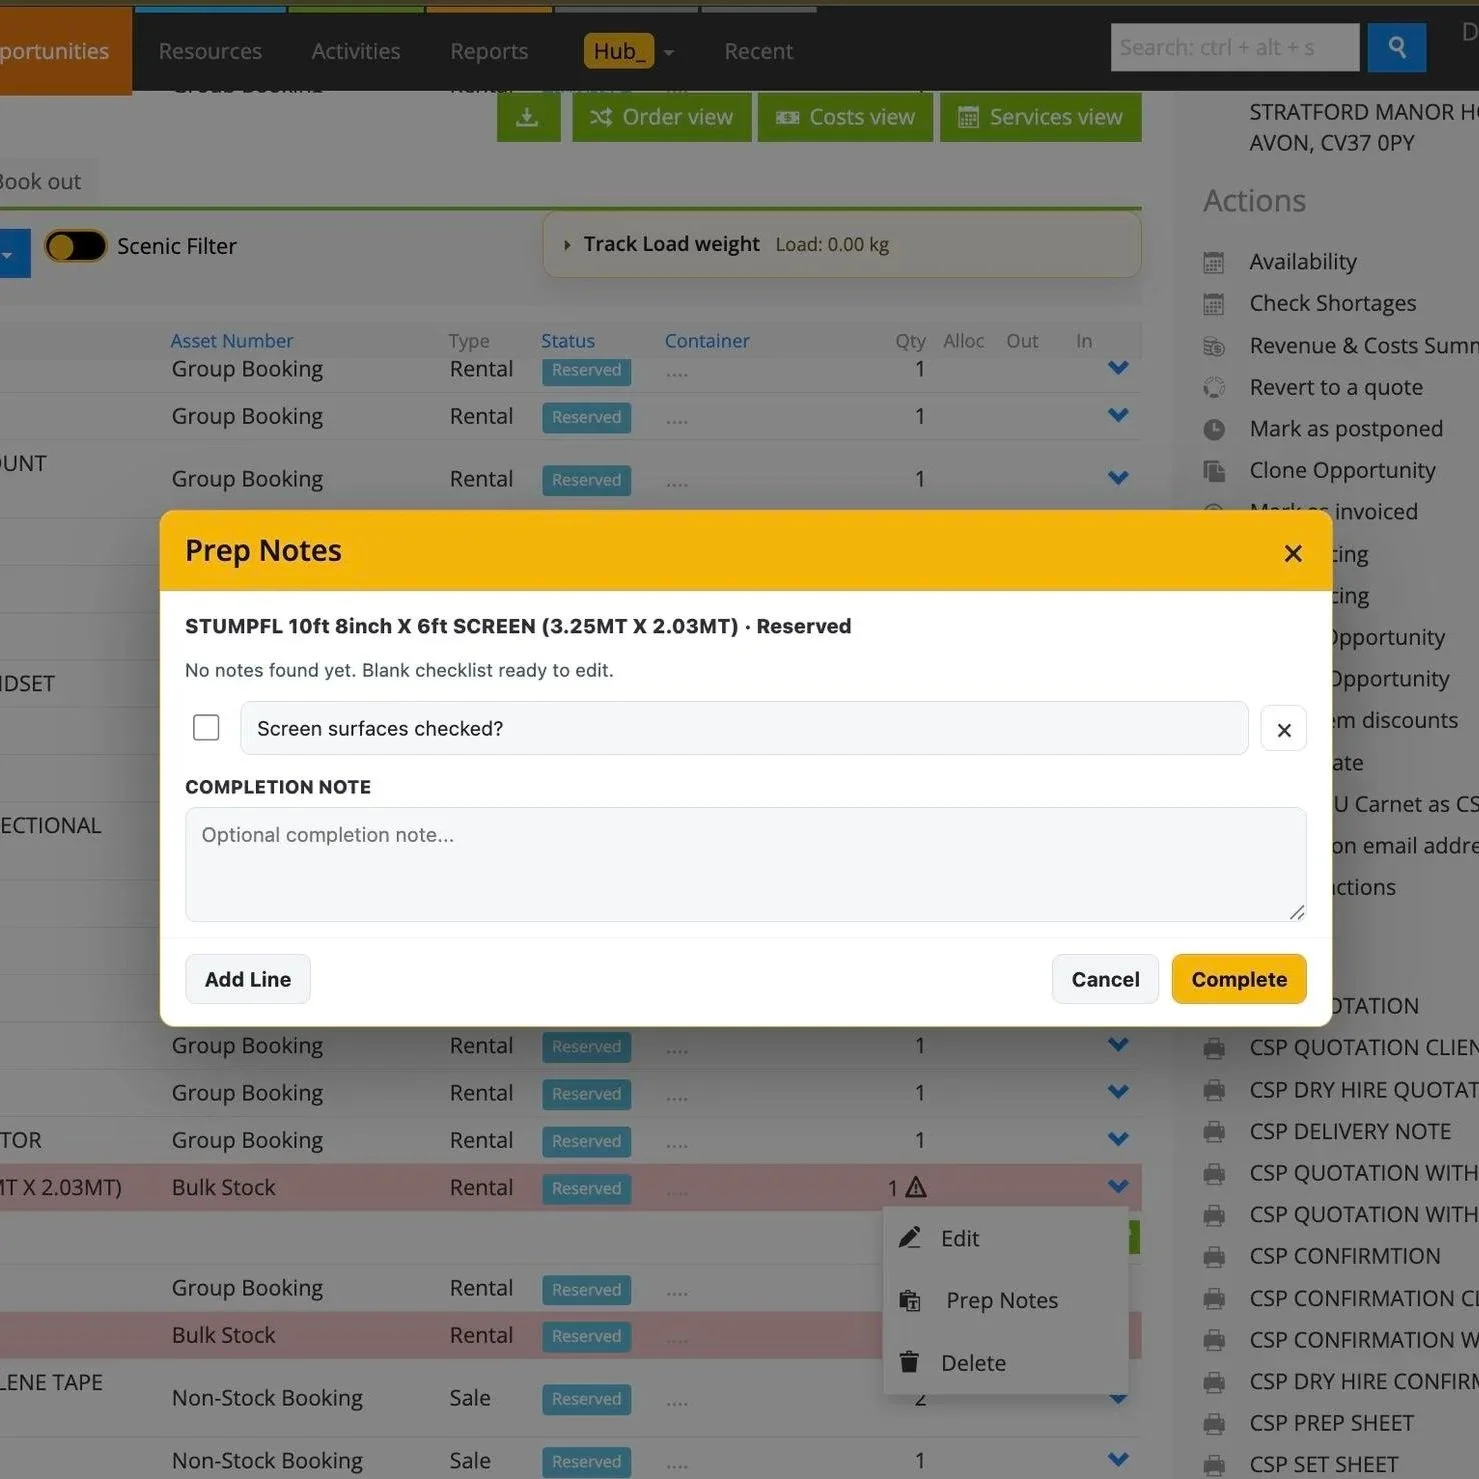
Prep Hub_
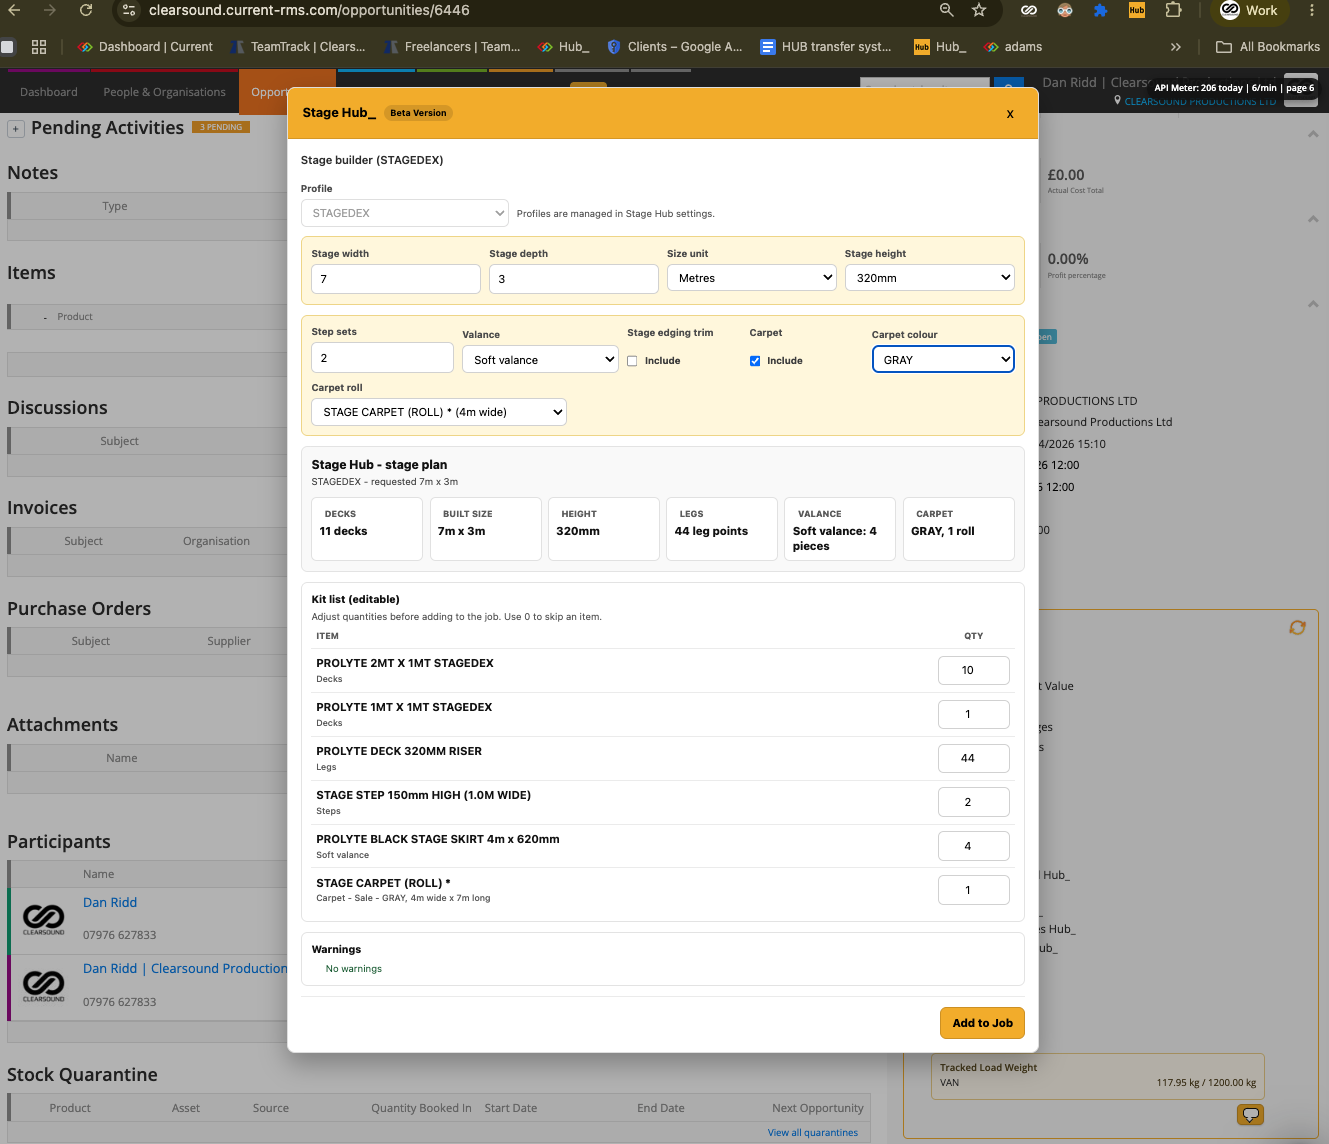
Stage Hub_
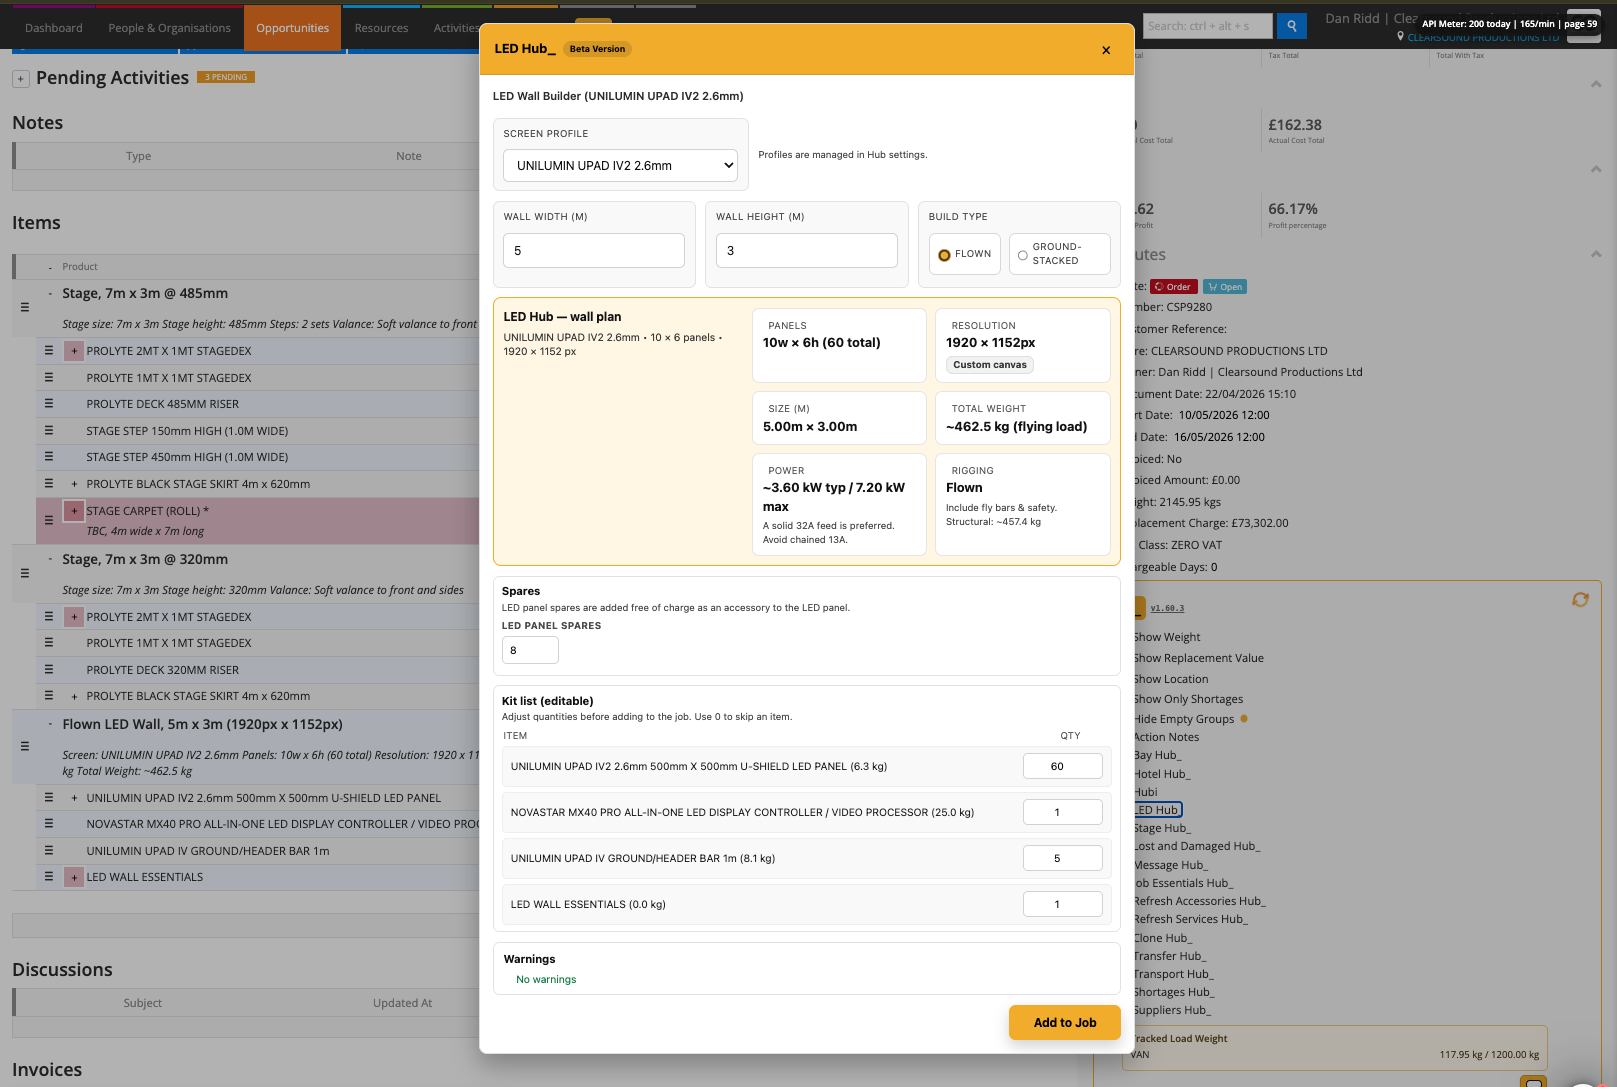
LED Hub_
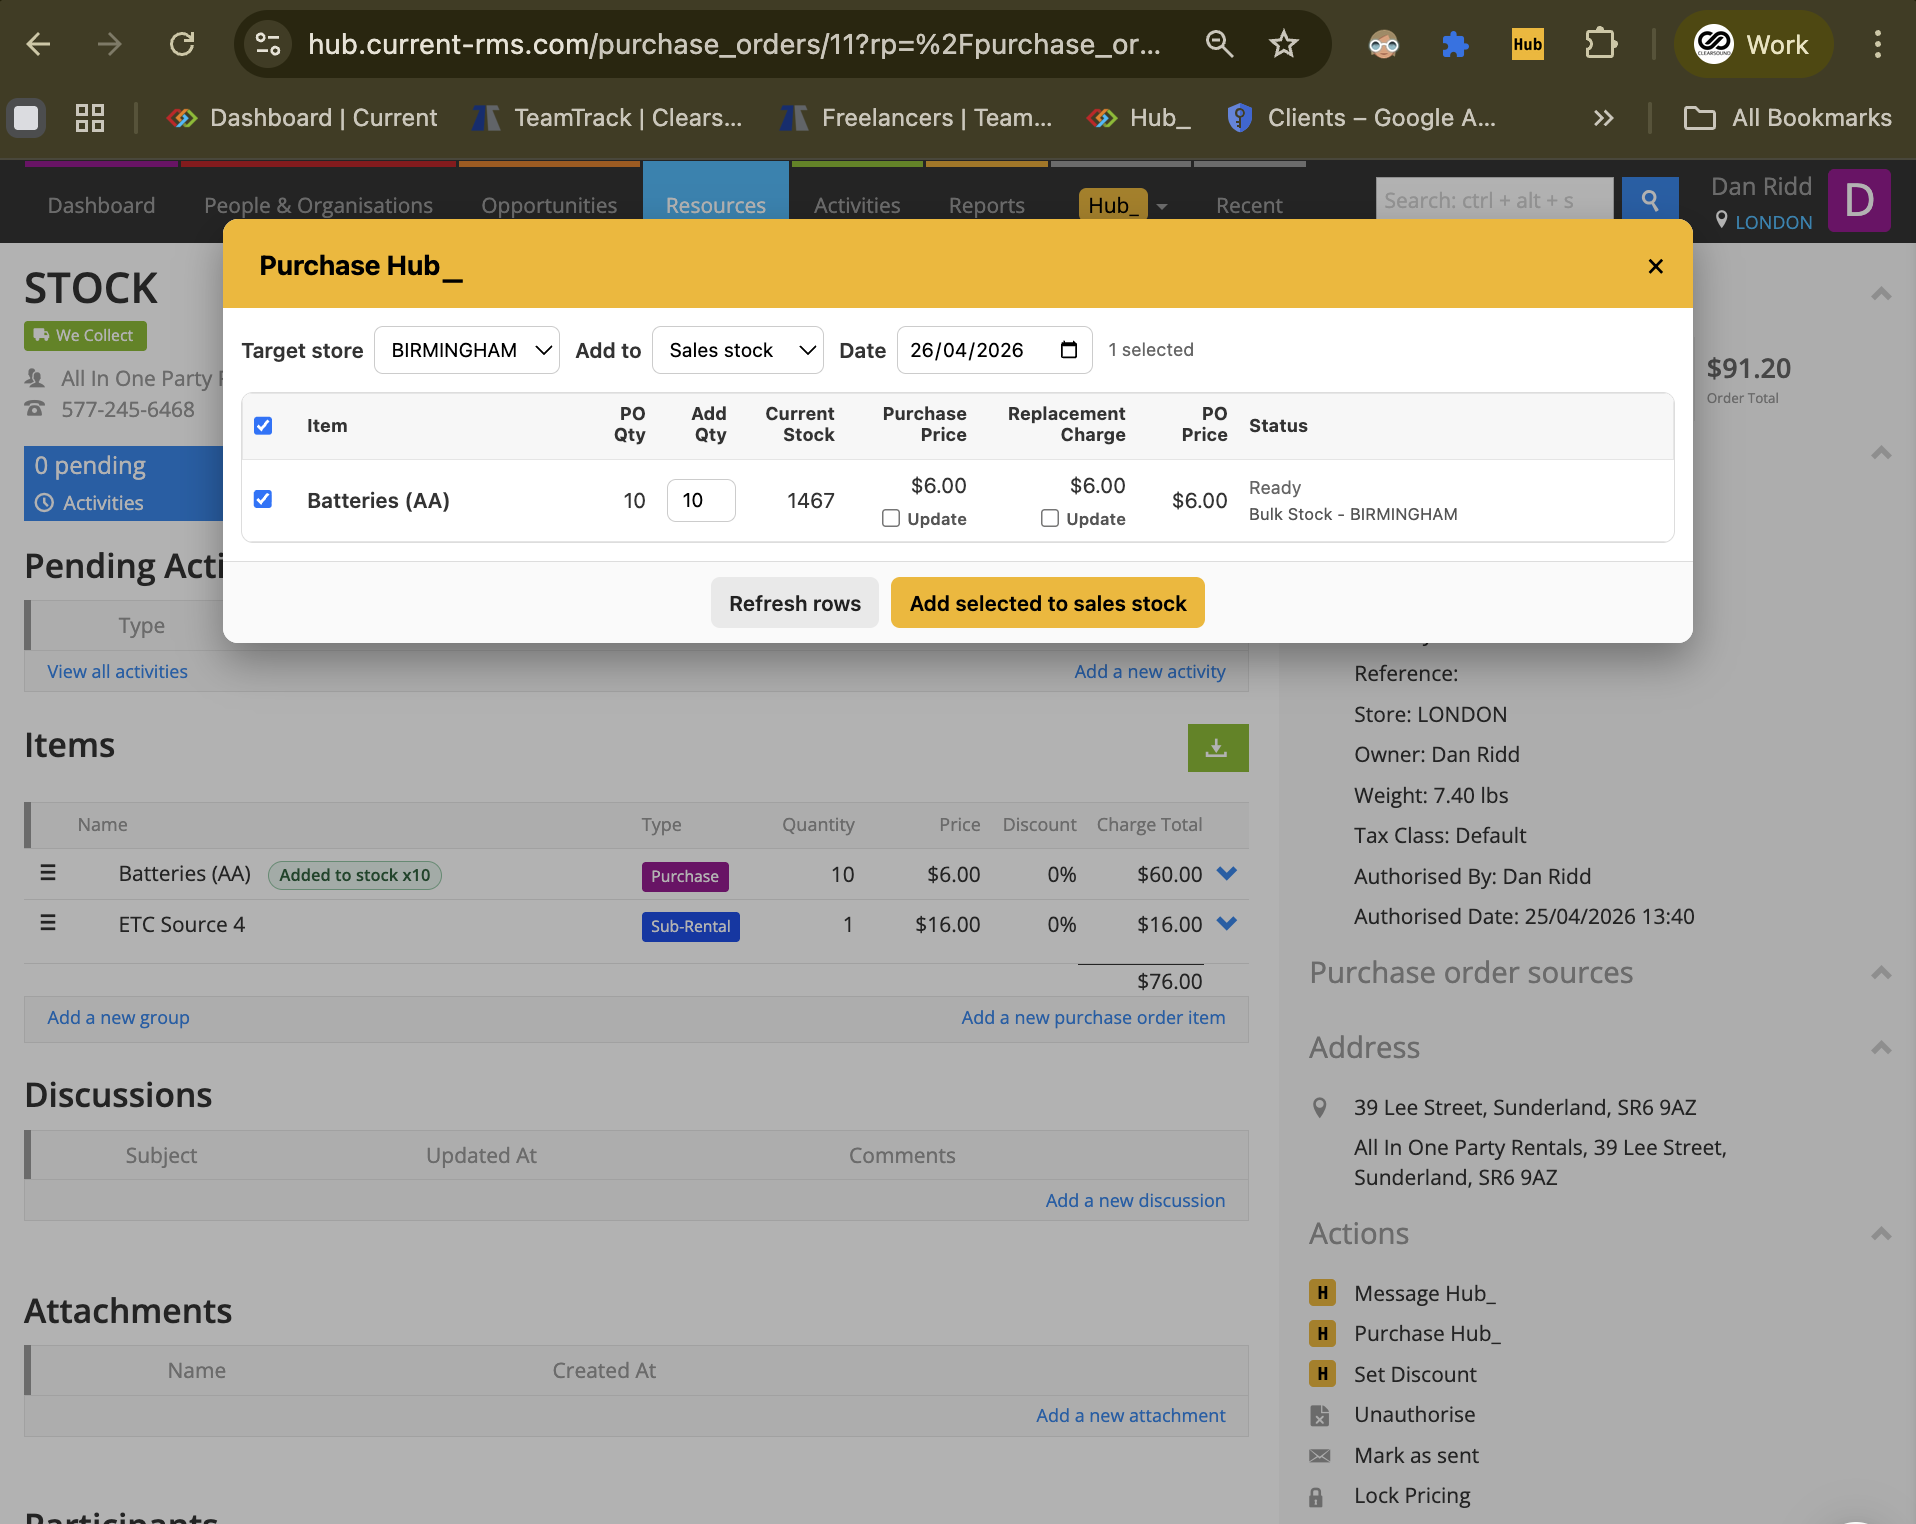
Purchase Hub_
Activity Hub_
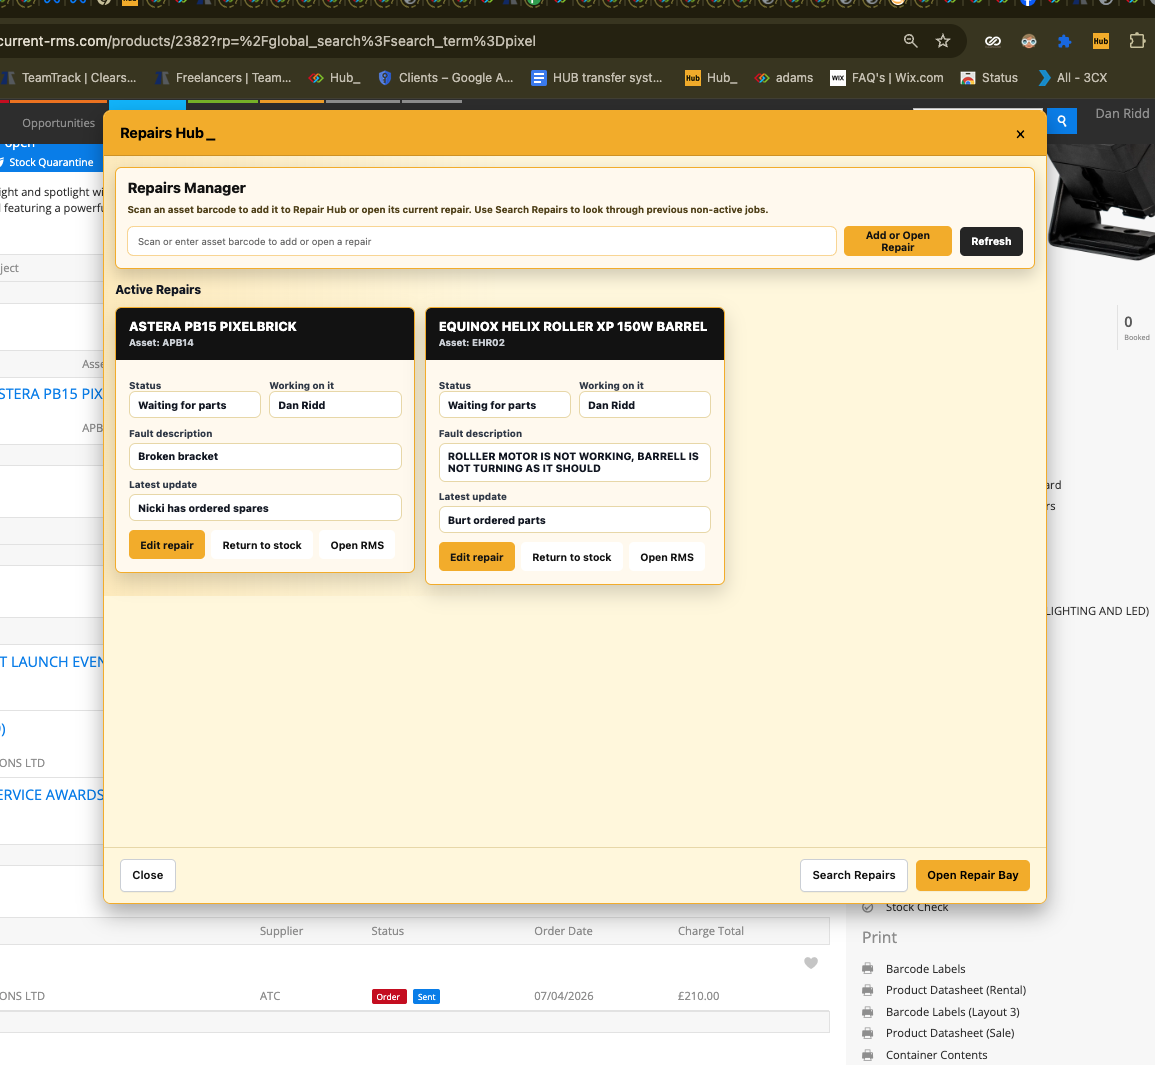
Repair Hub_
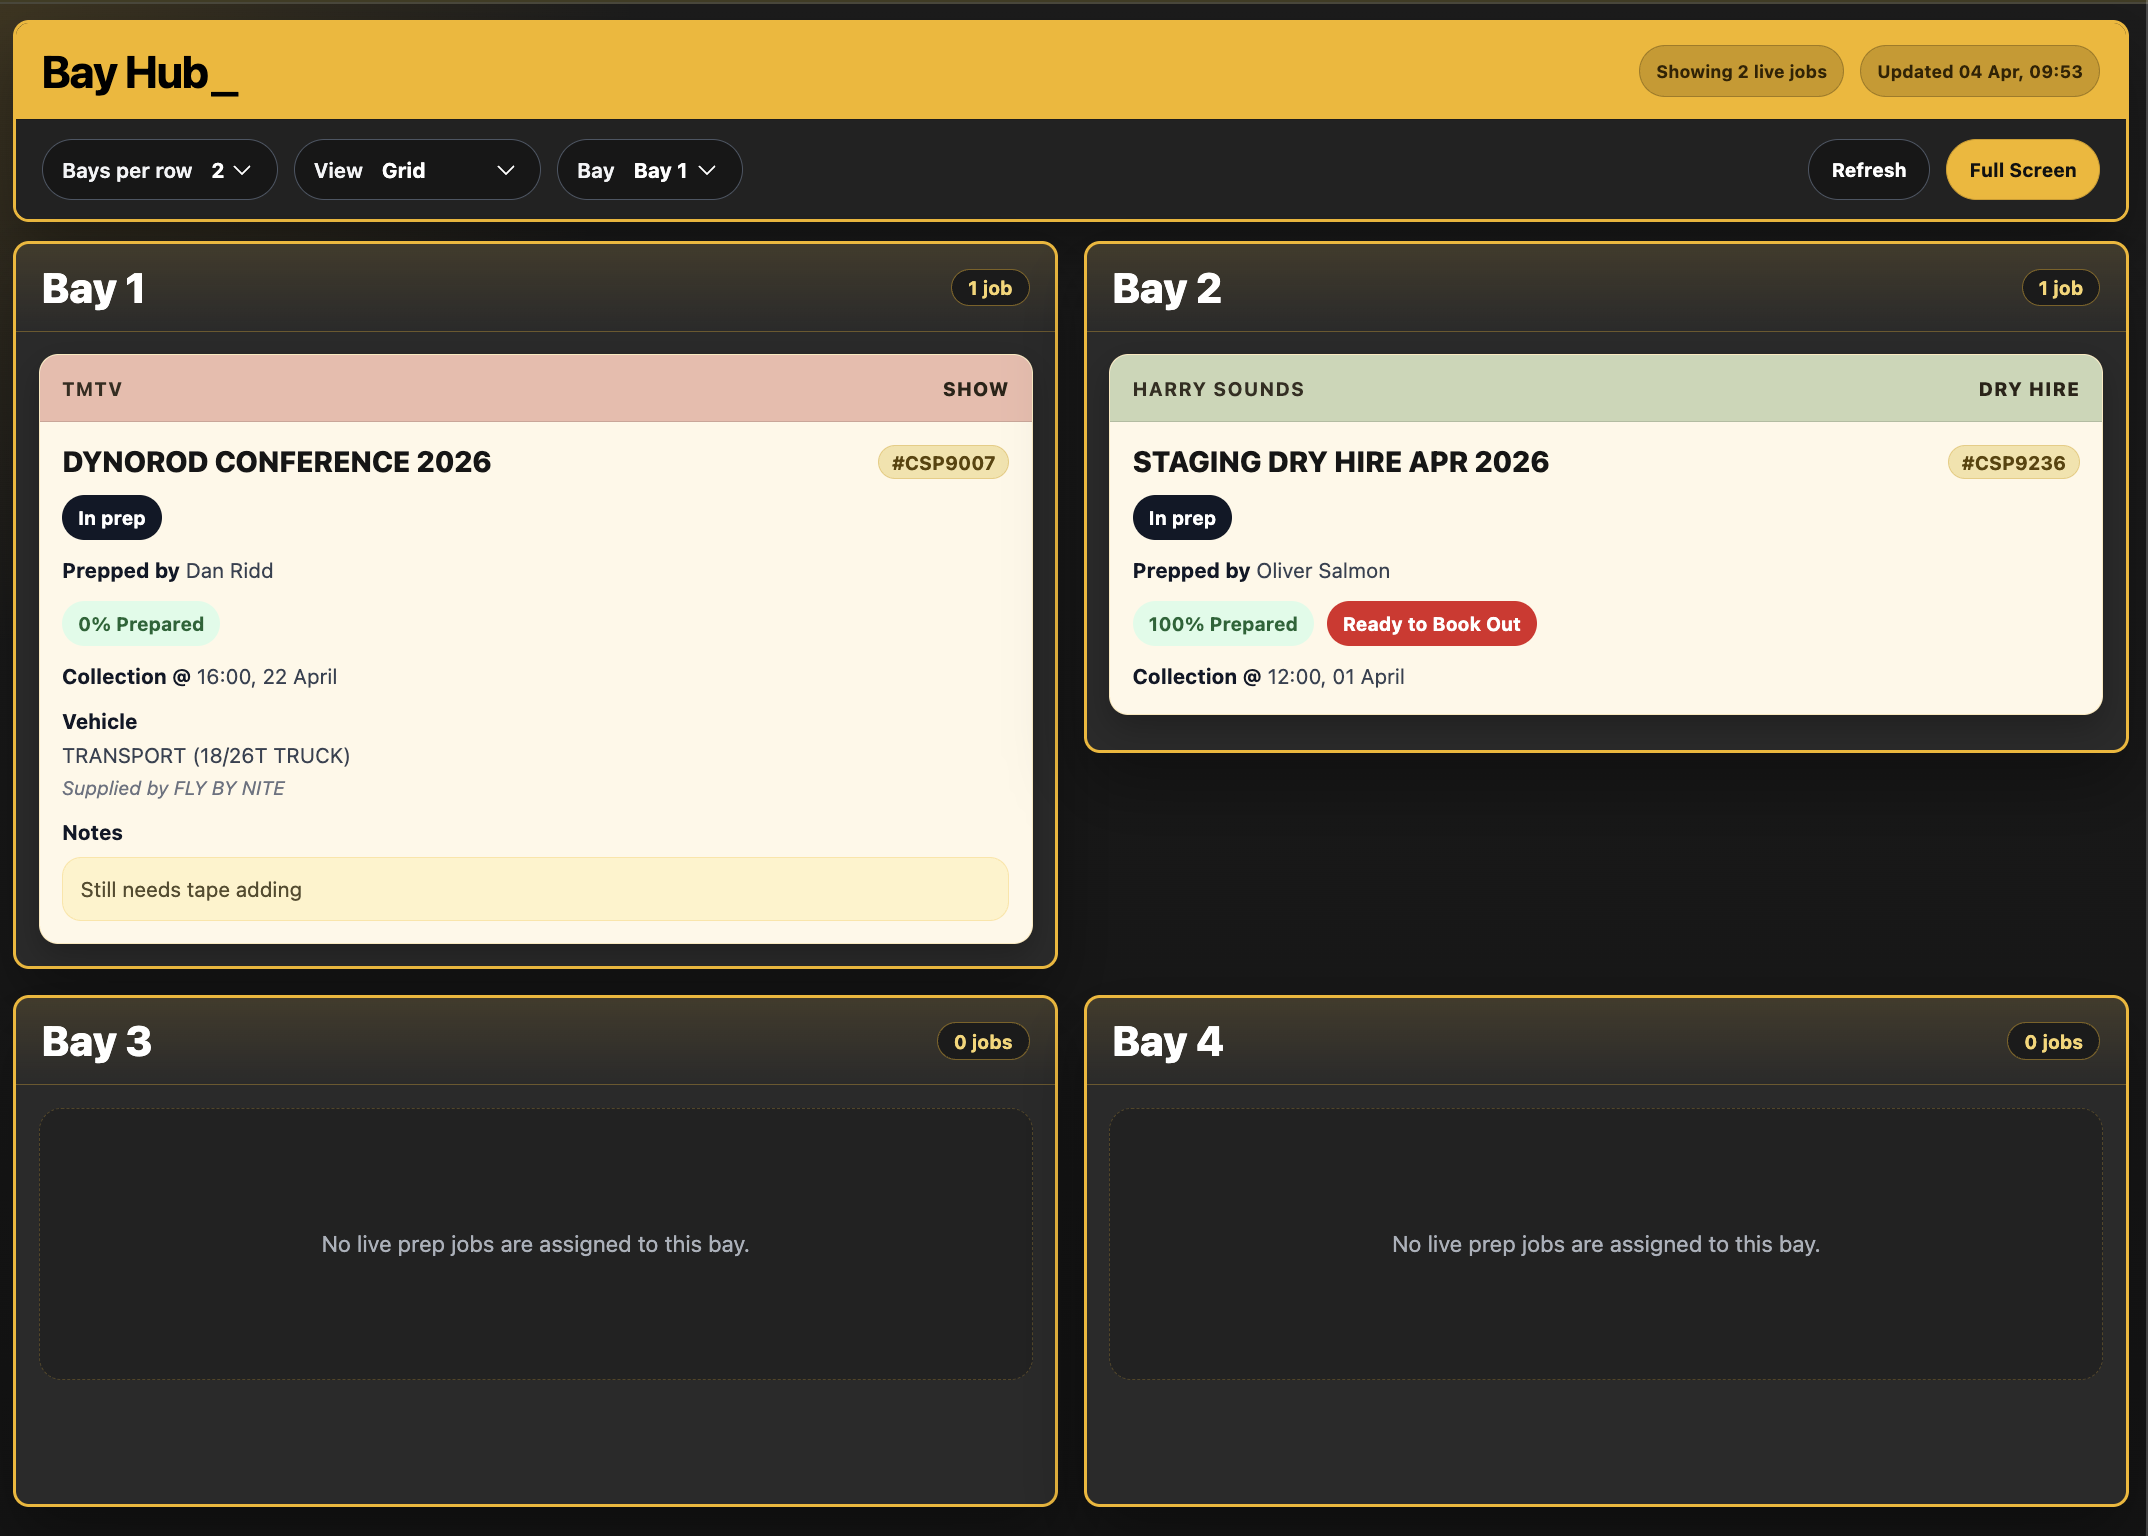
Bay Hub_
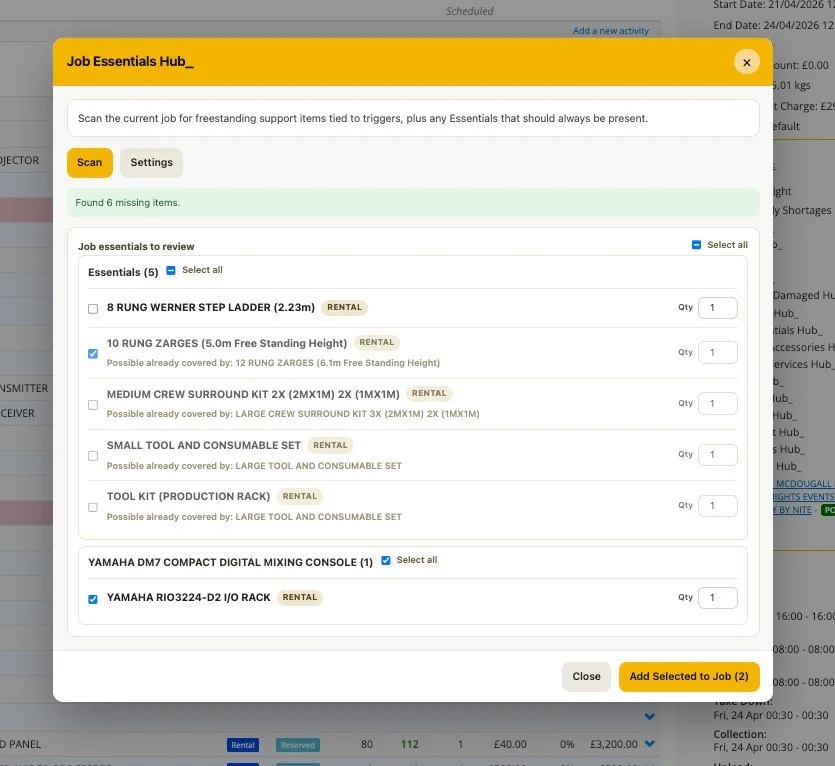
Job Essentials Hub_
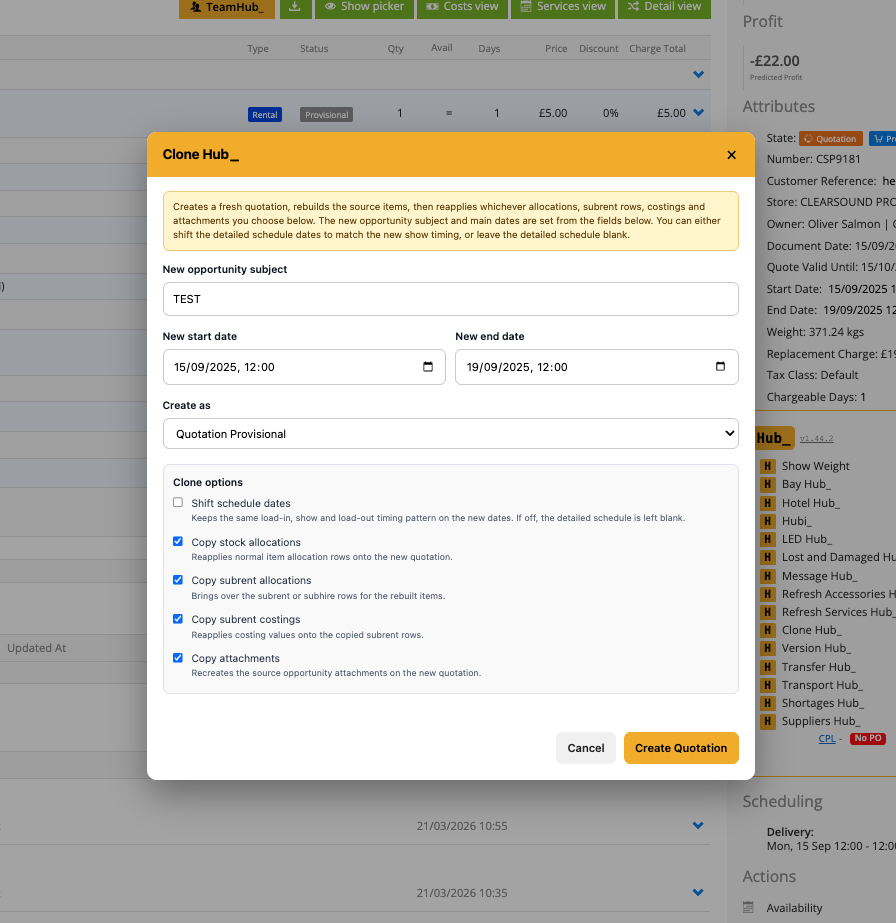
Clone Hub_
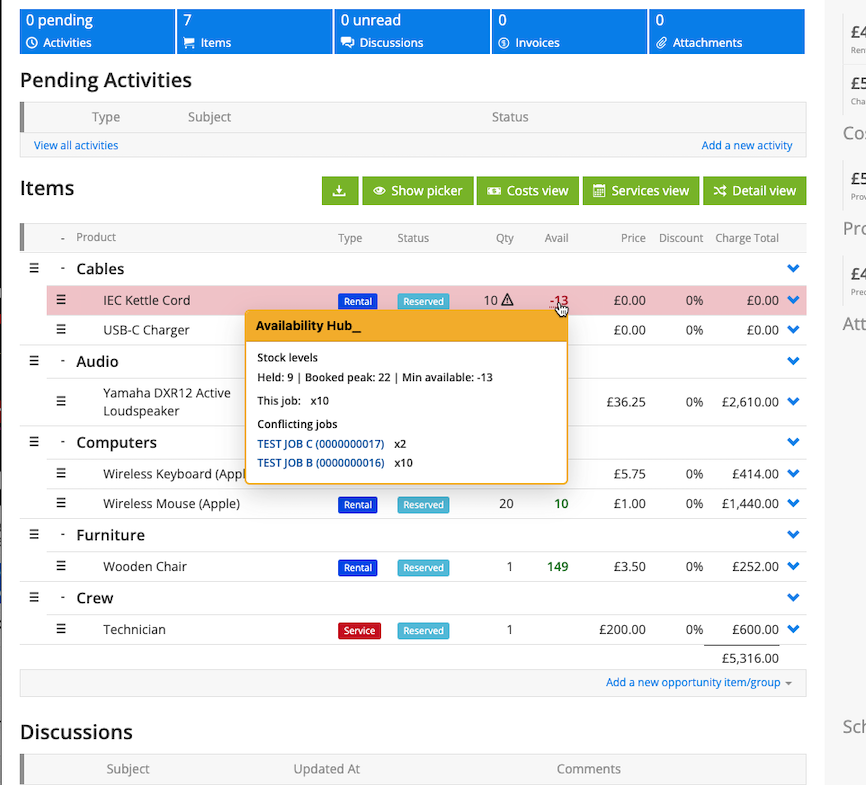
Availability Hub_
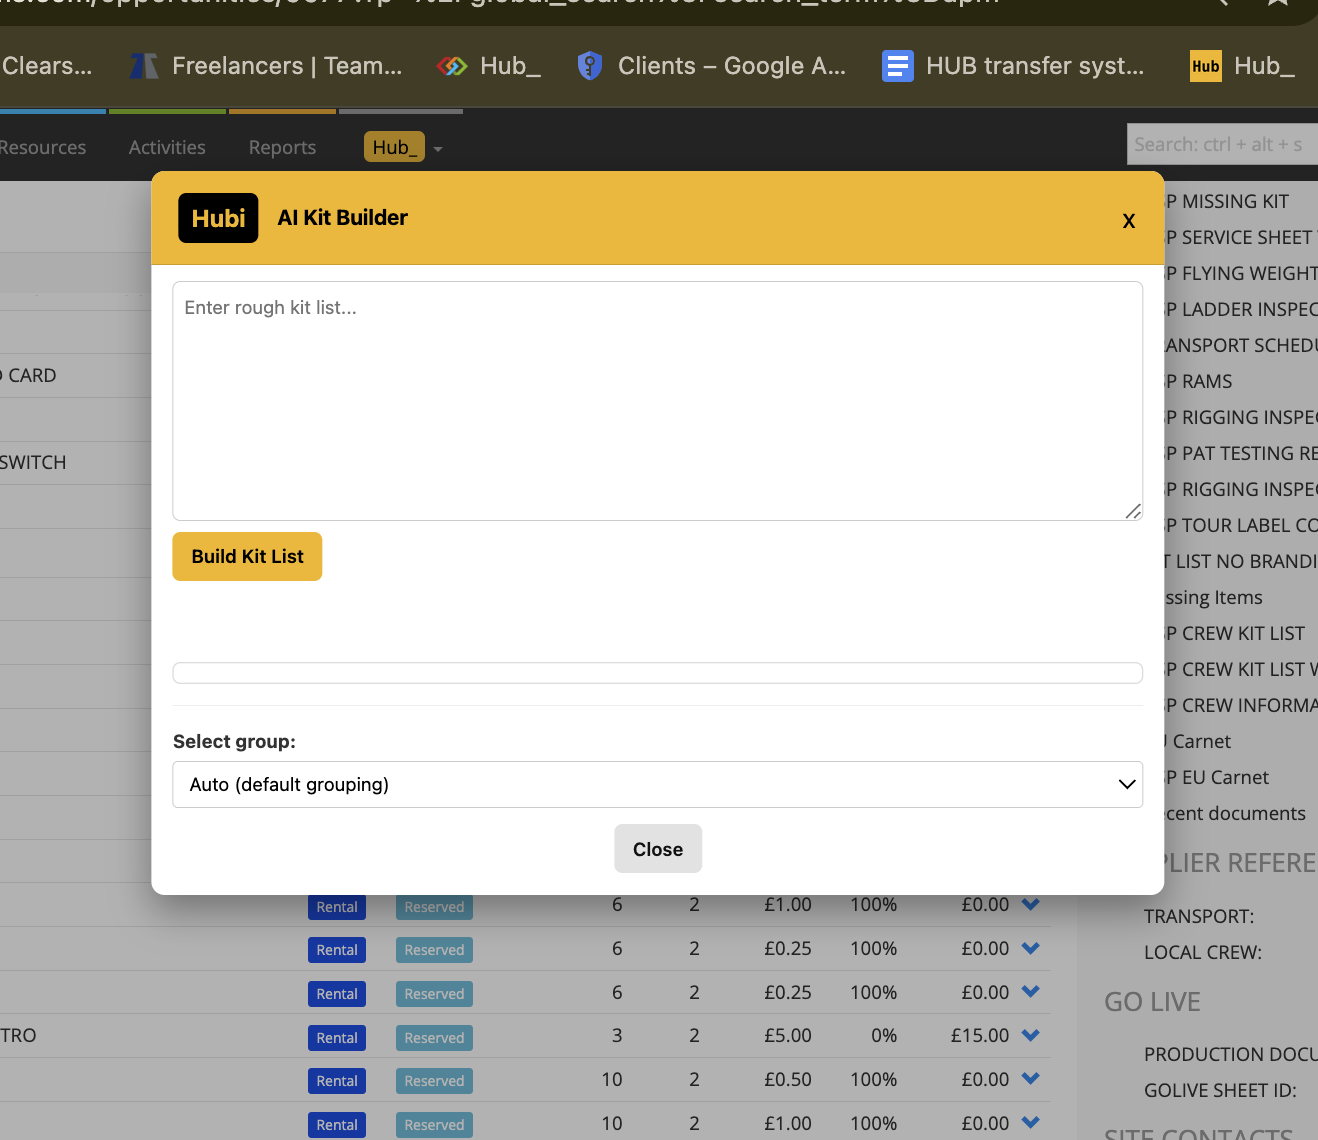
Hubi
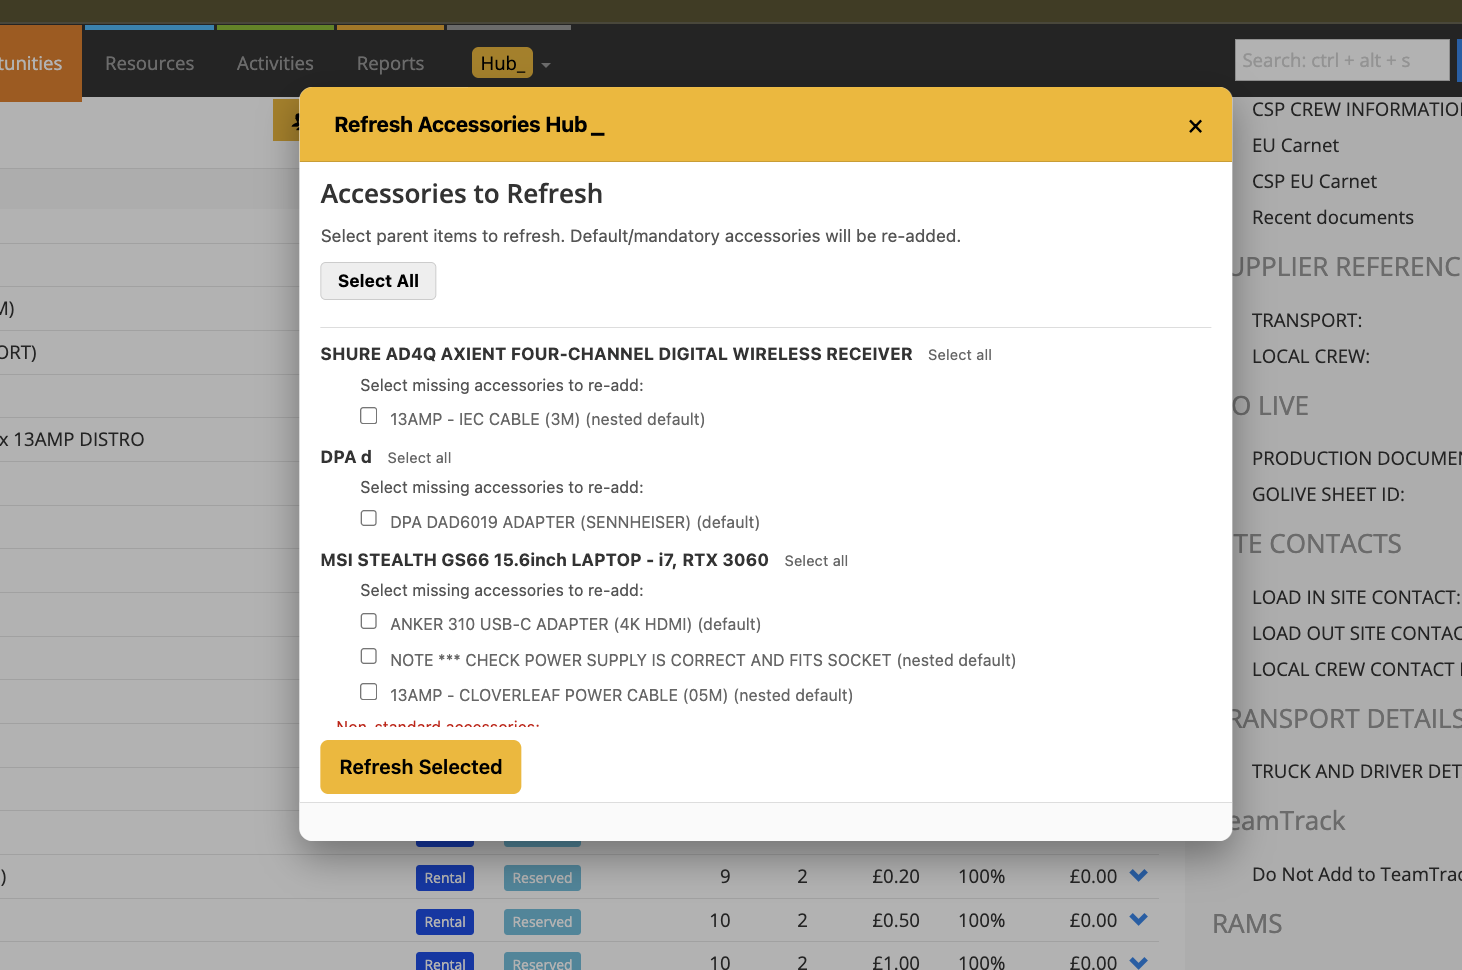
Refresh Accessories Hub_
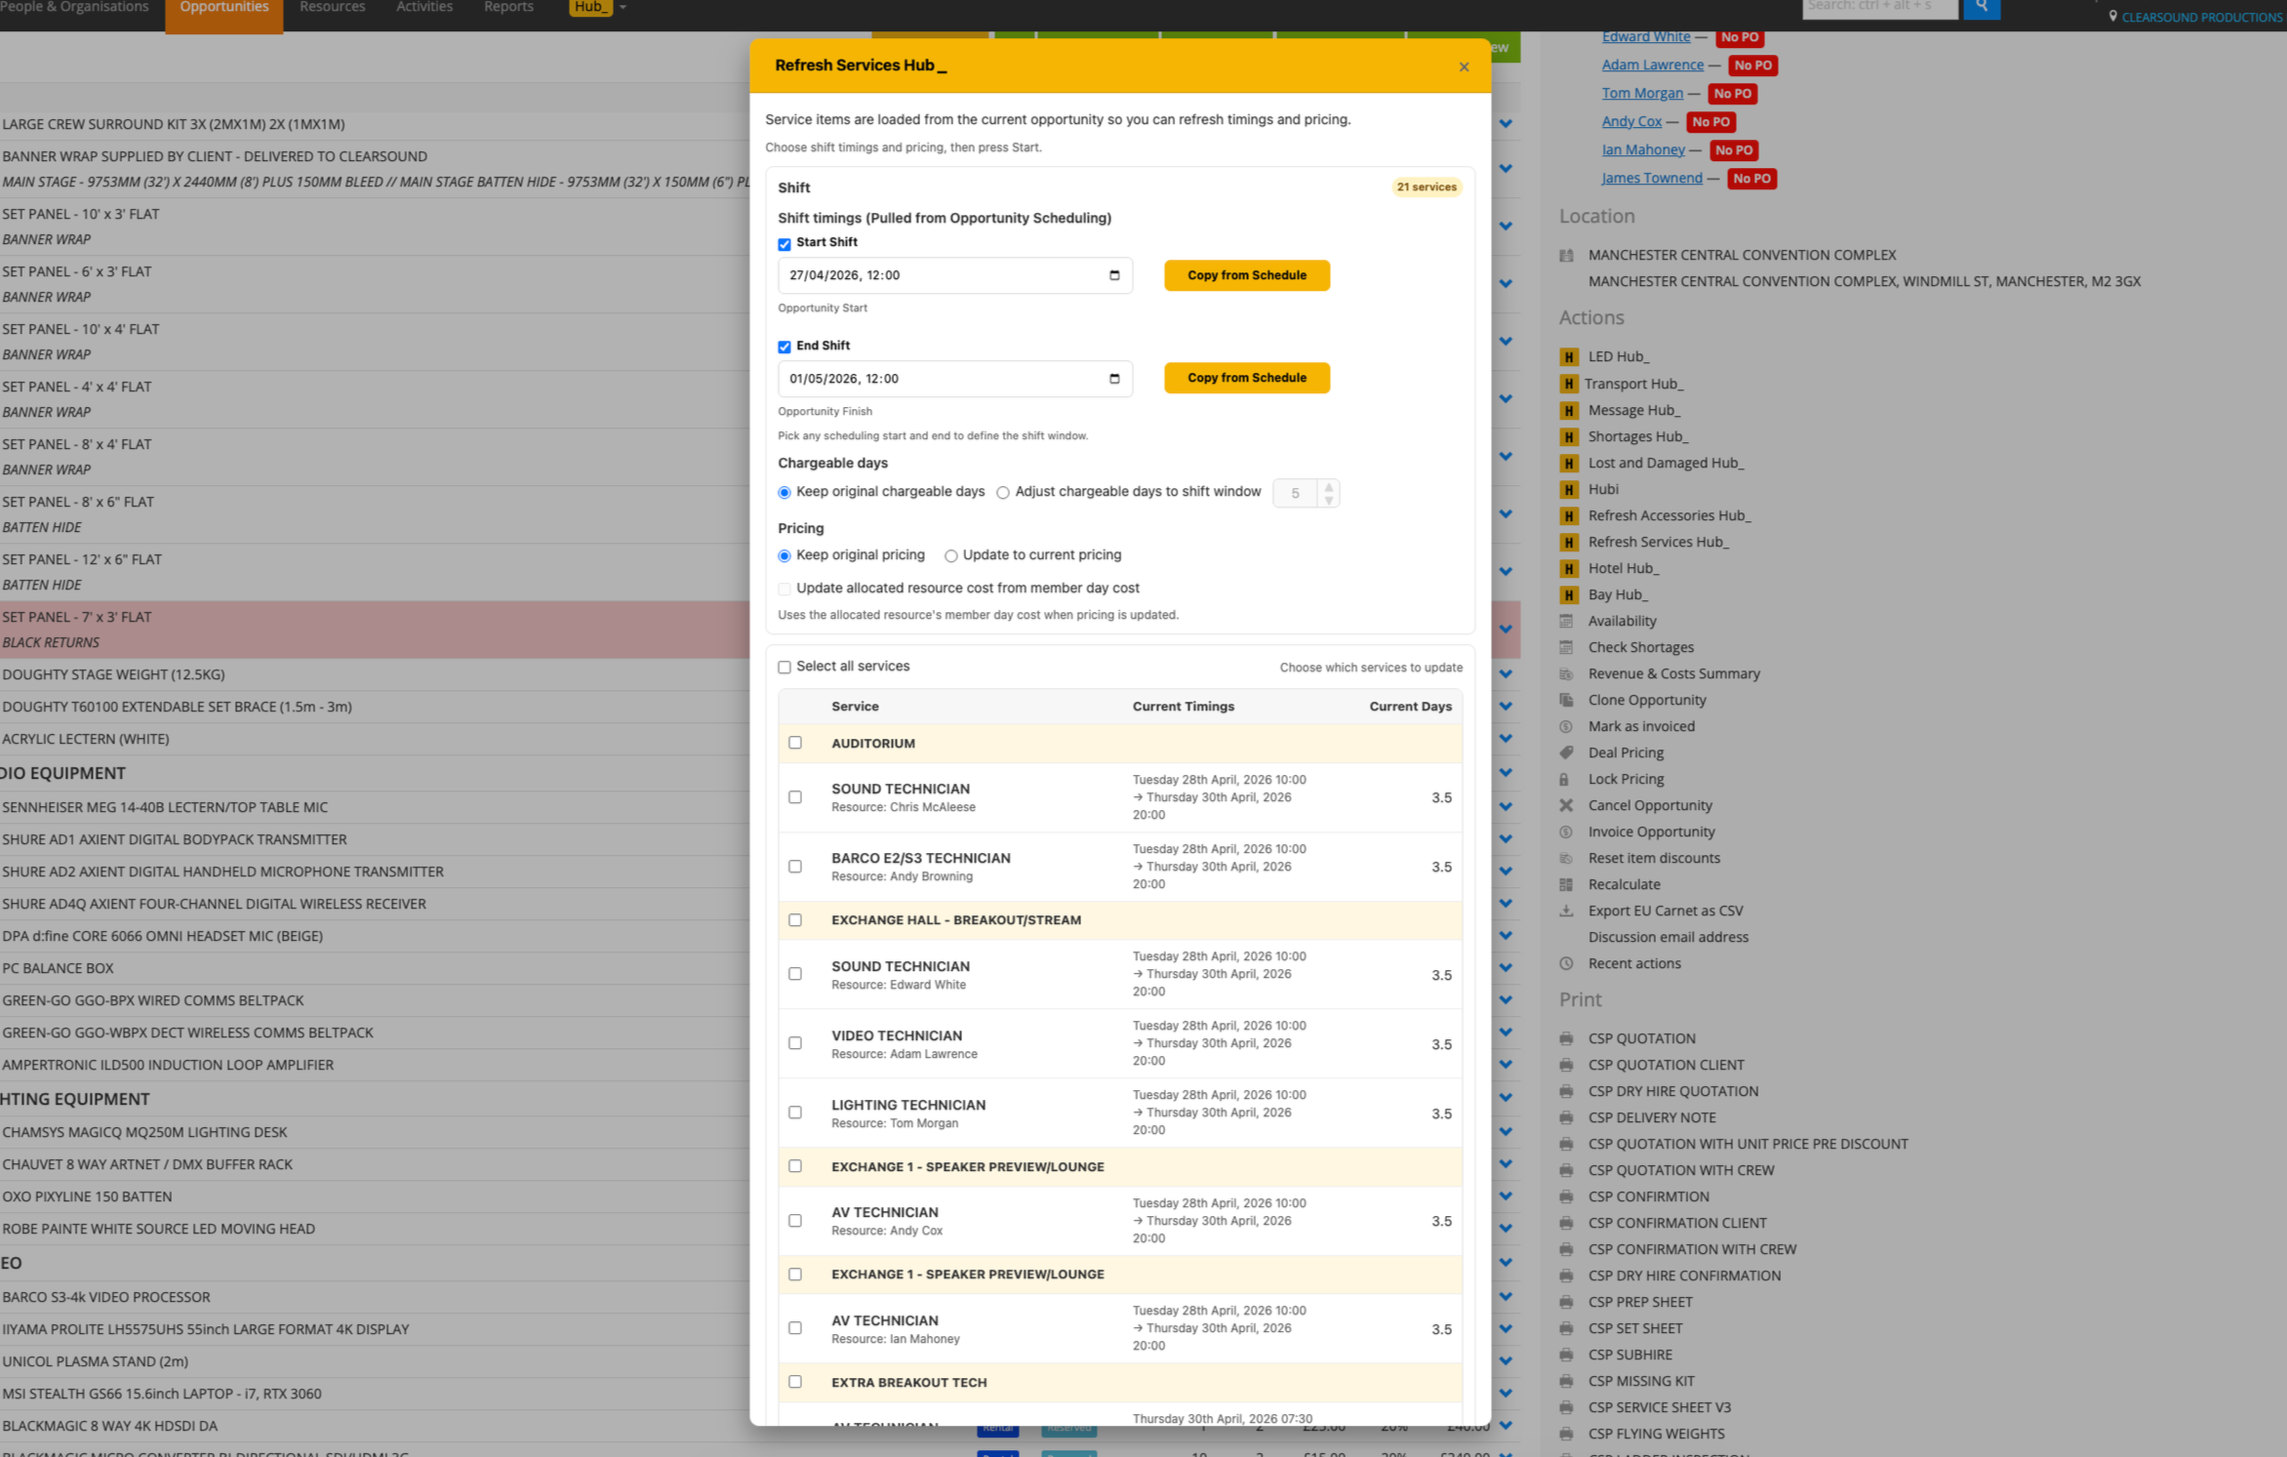
Refresh Services Hub_
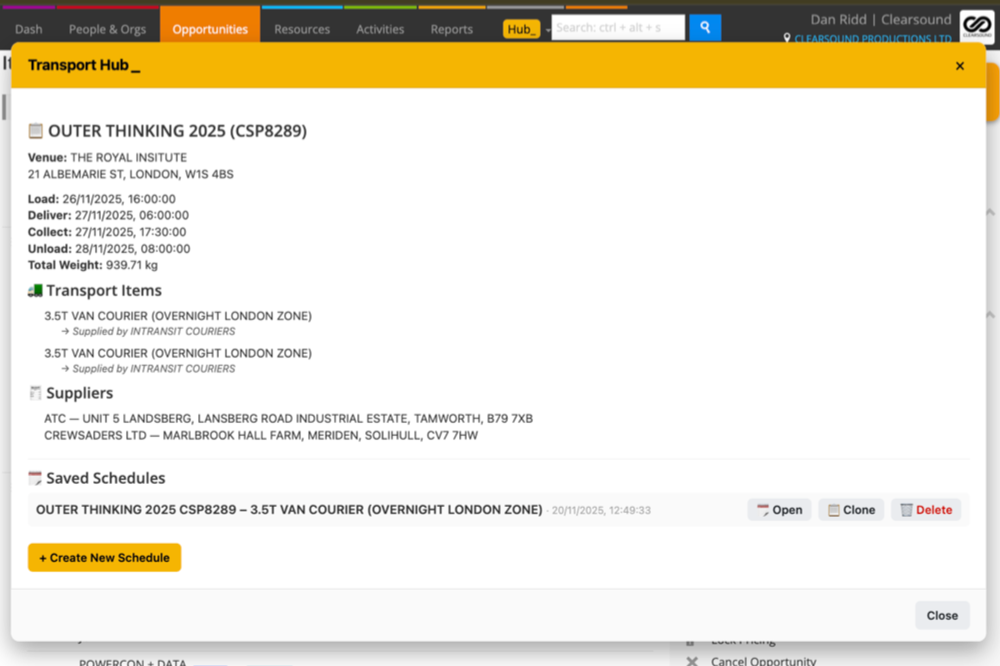
Transport Hub_
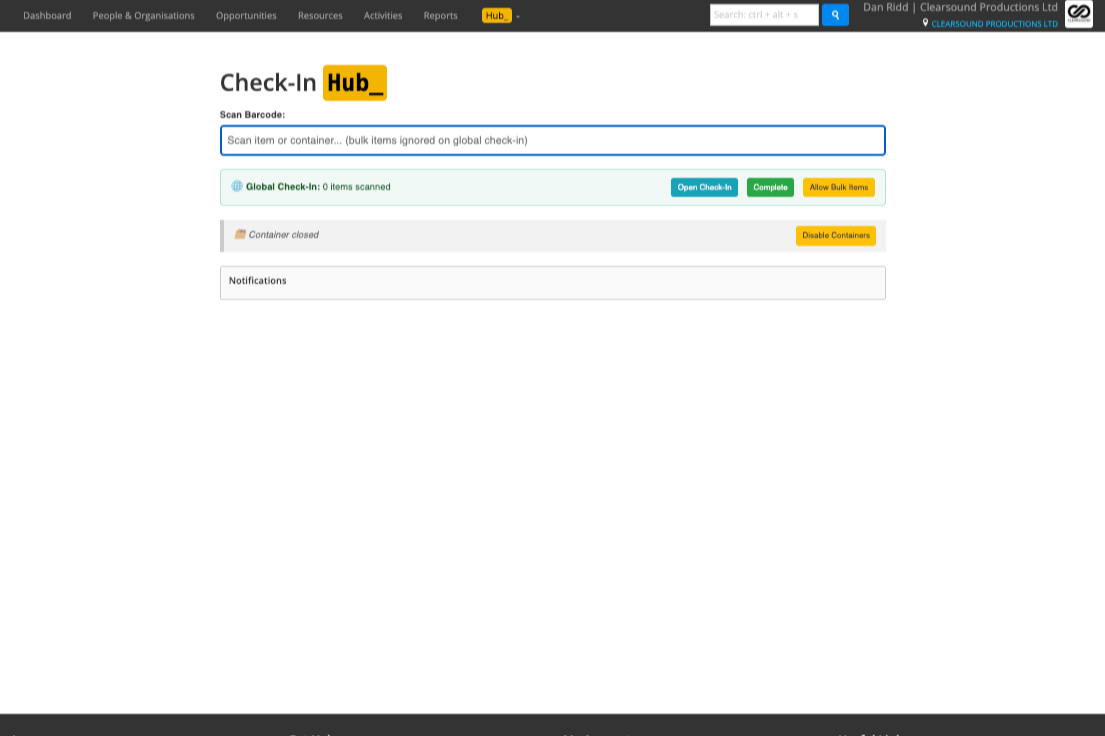
Check-In Hub_
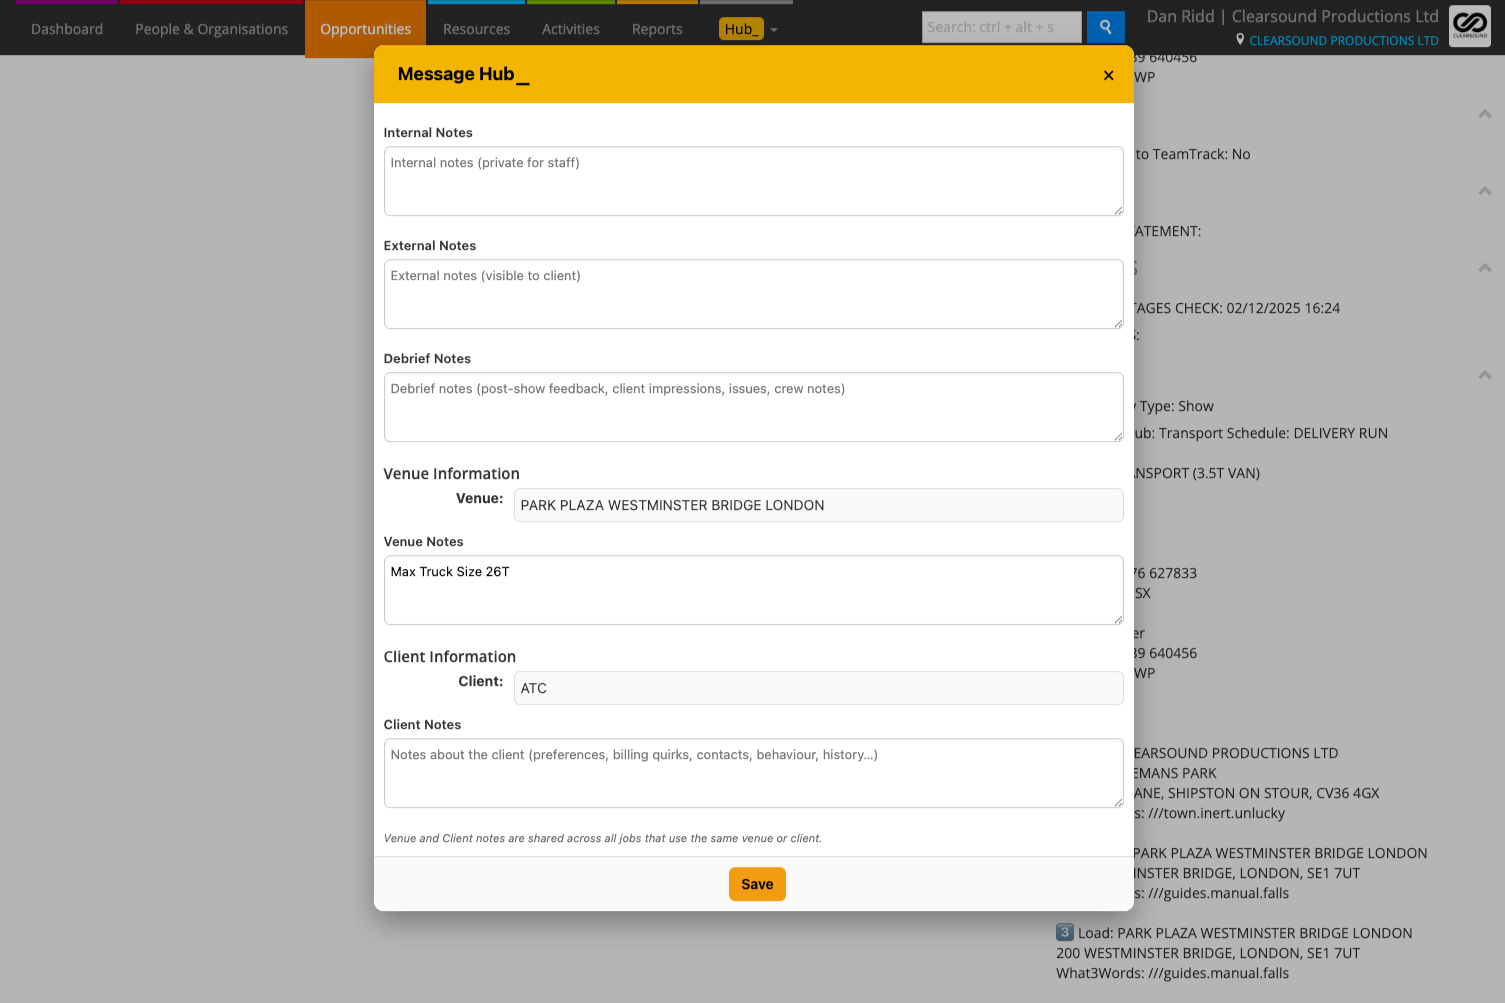
Message Hub_
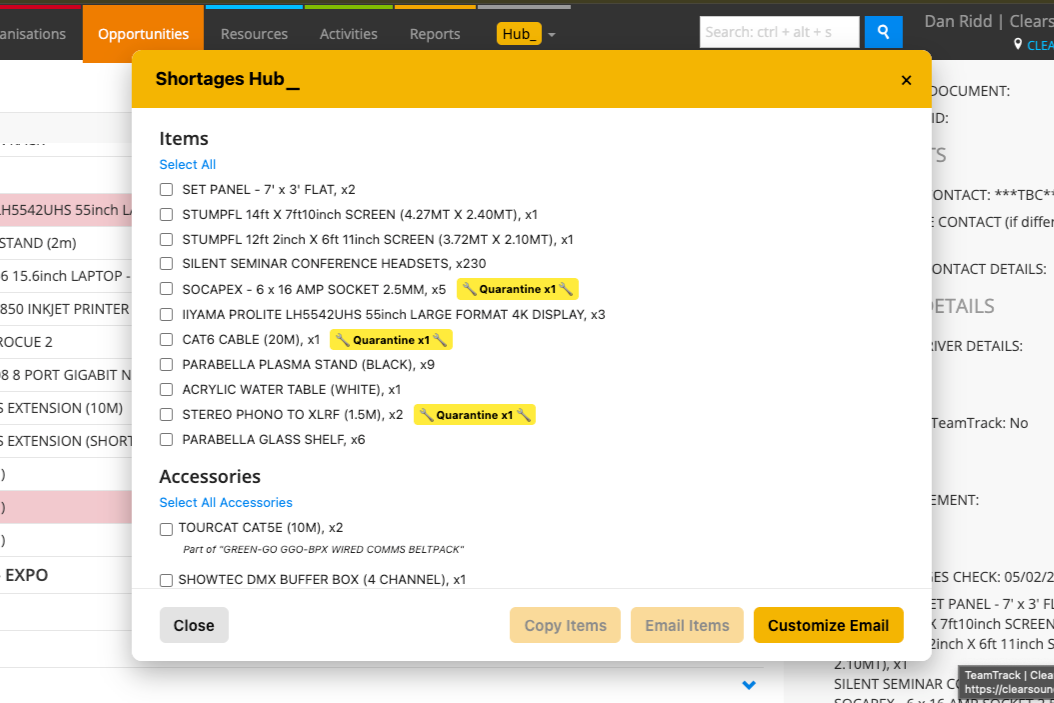
Shortages Hub_
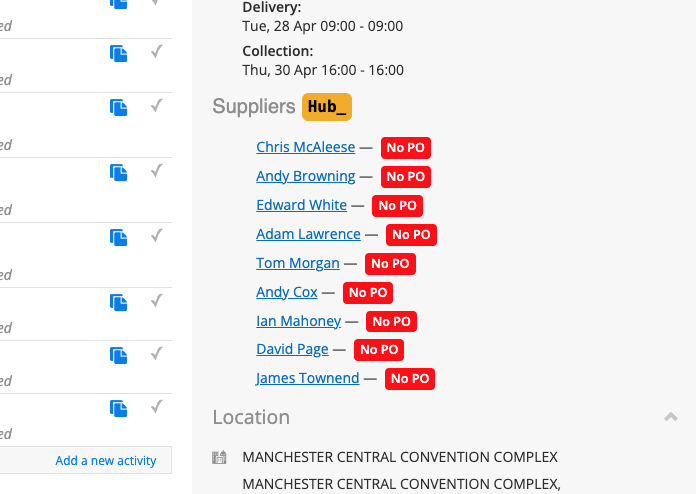
Suppliers Hub_
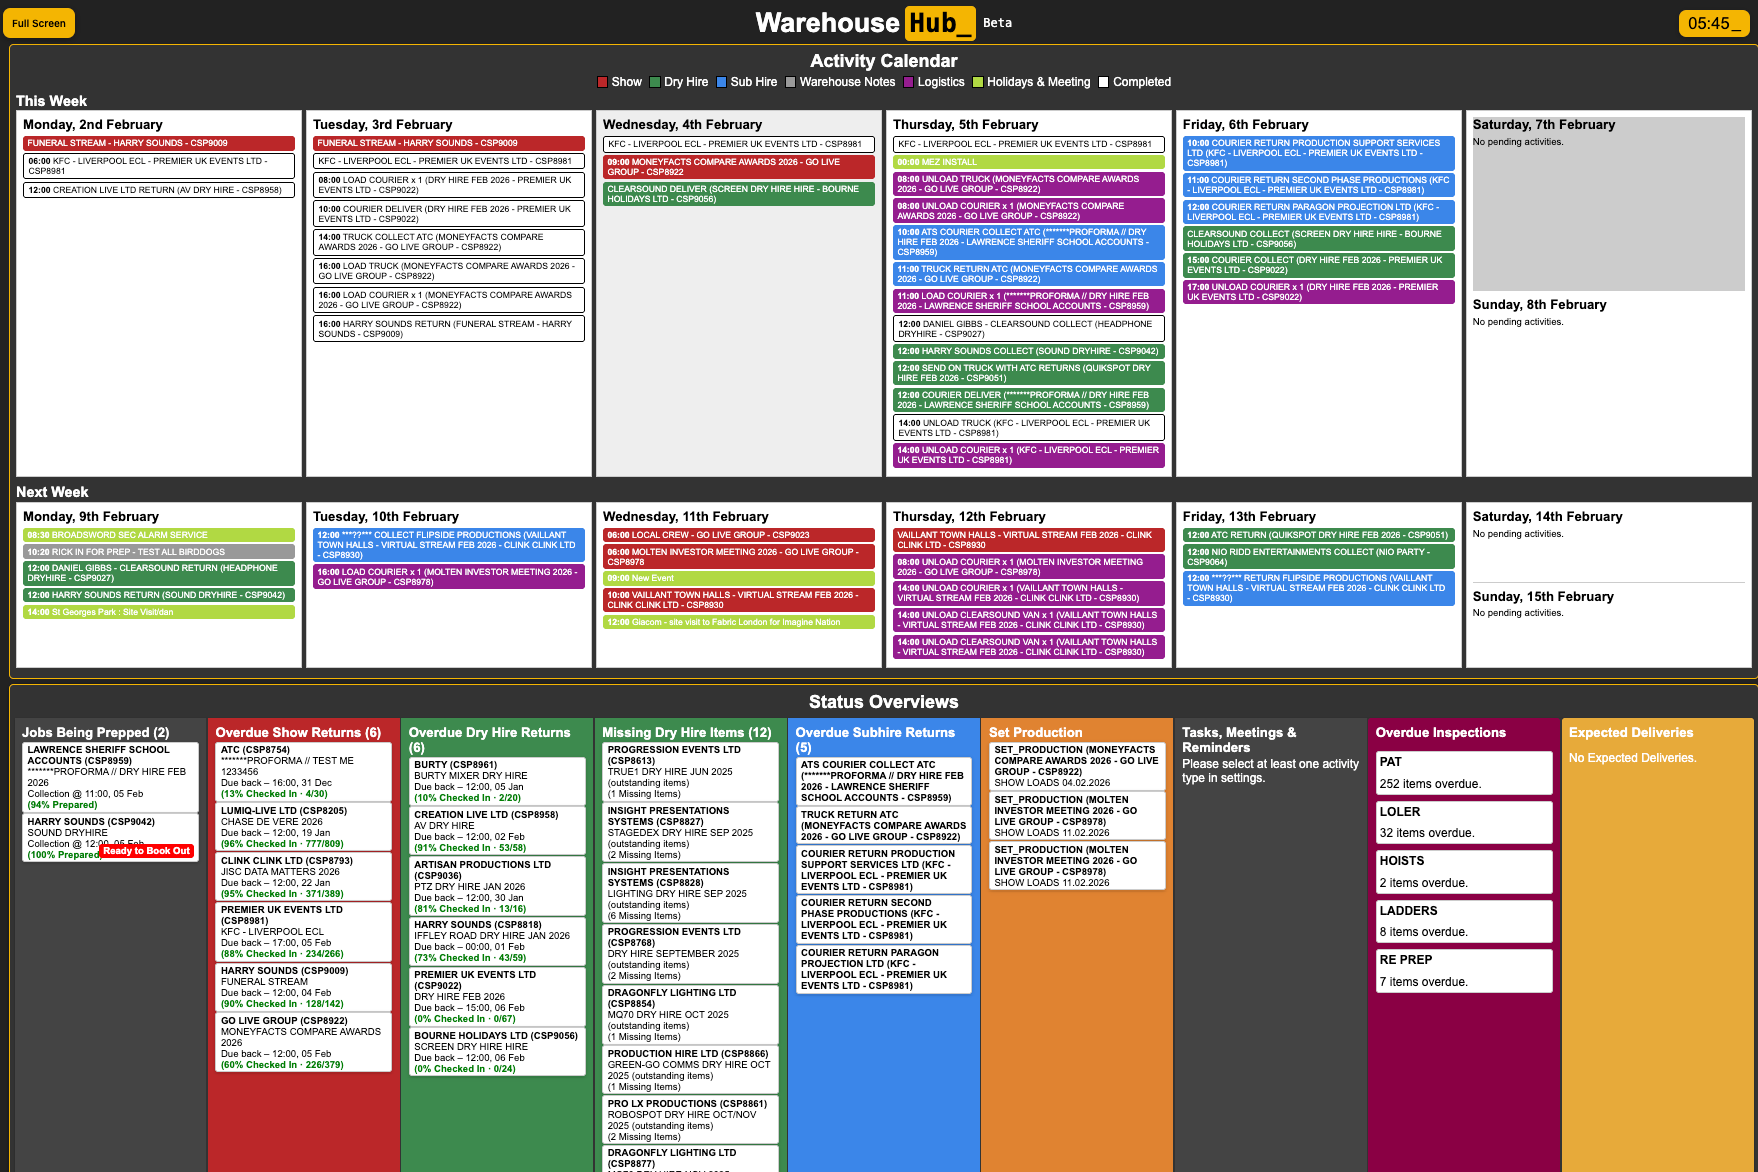
Warehouse Hub_
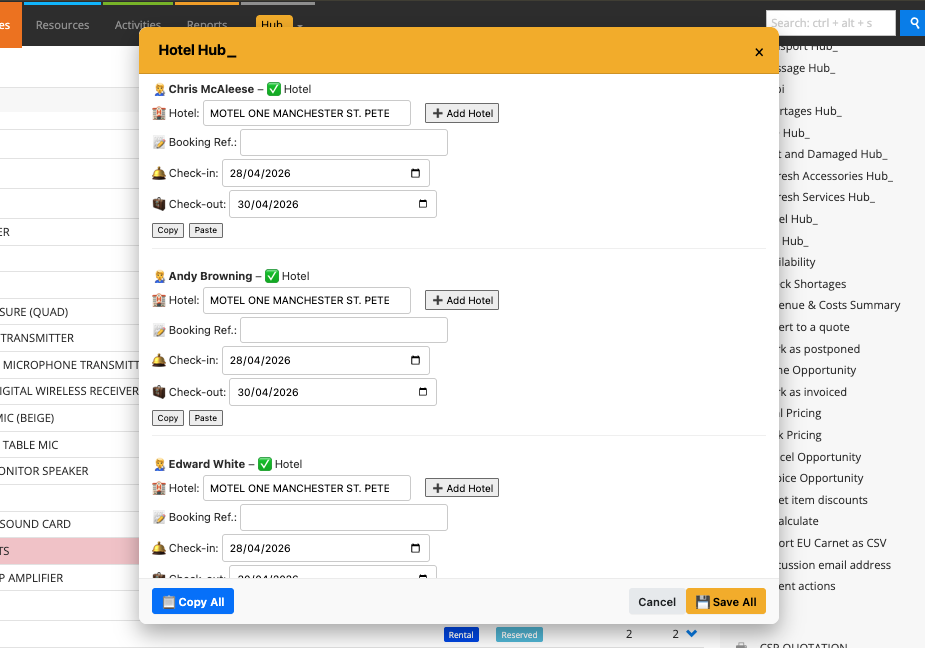
Hotel Hub_
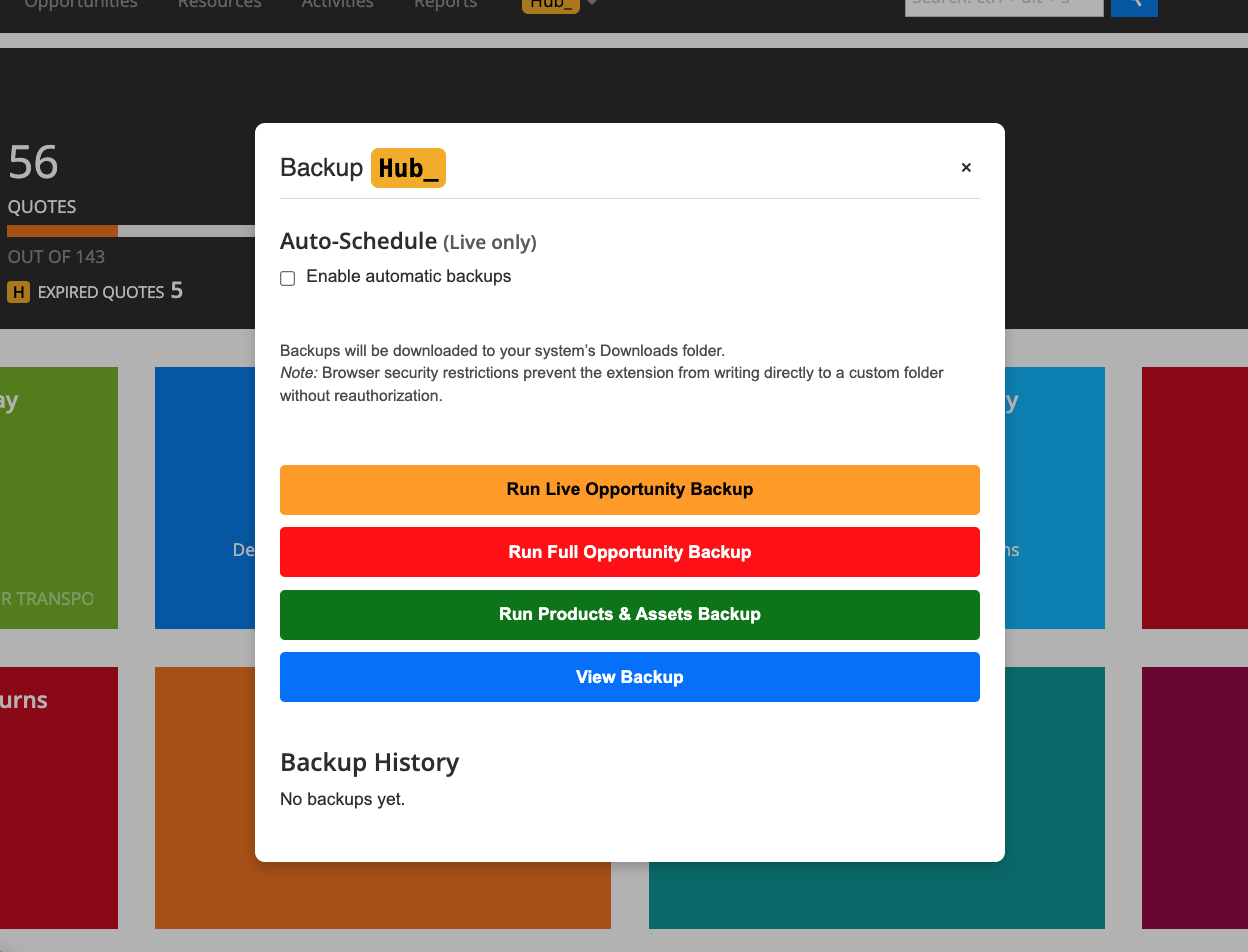
Backup Hub_
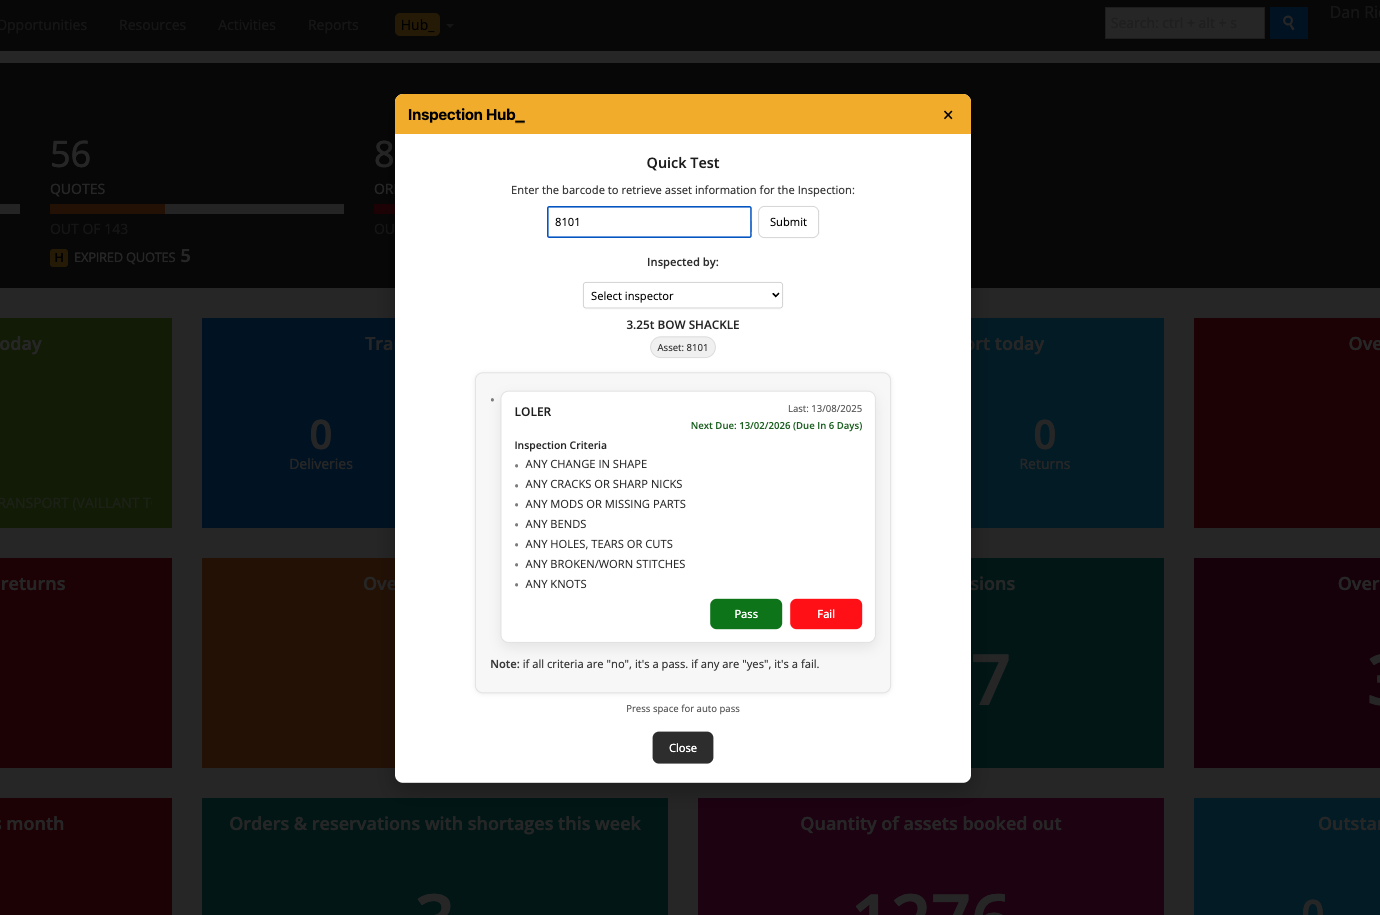
Inspection Hub_
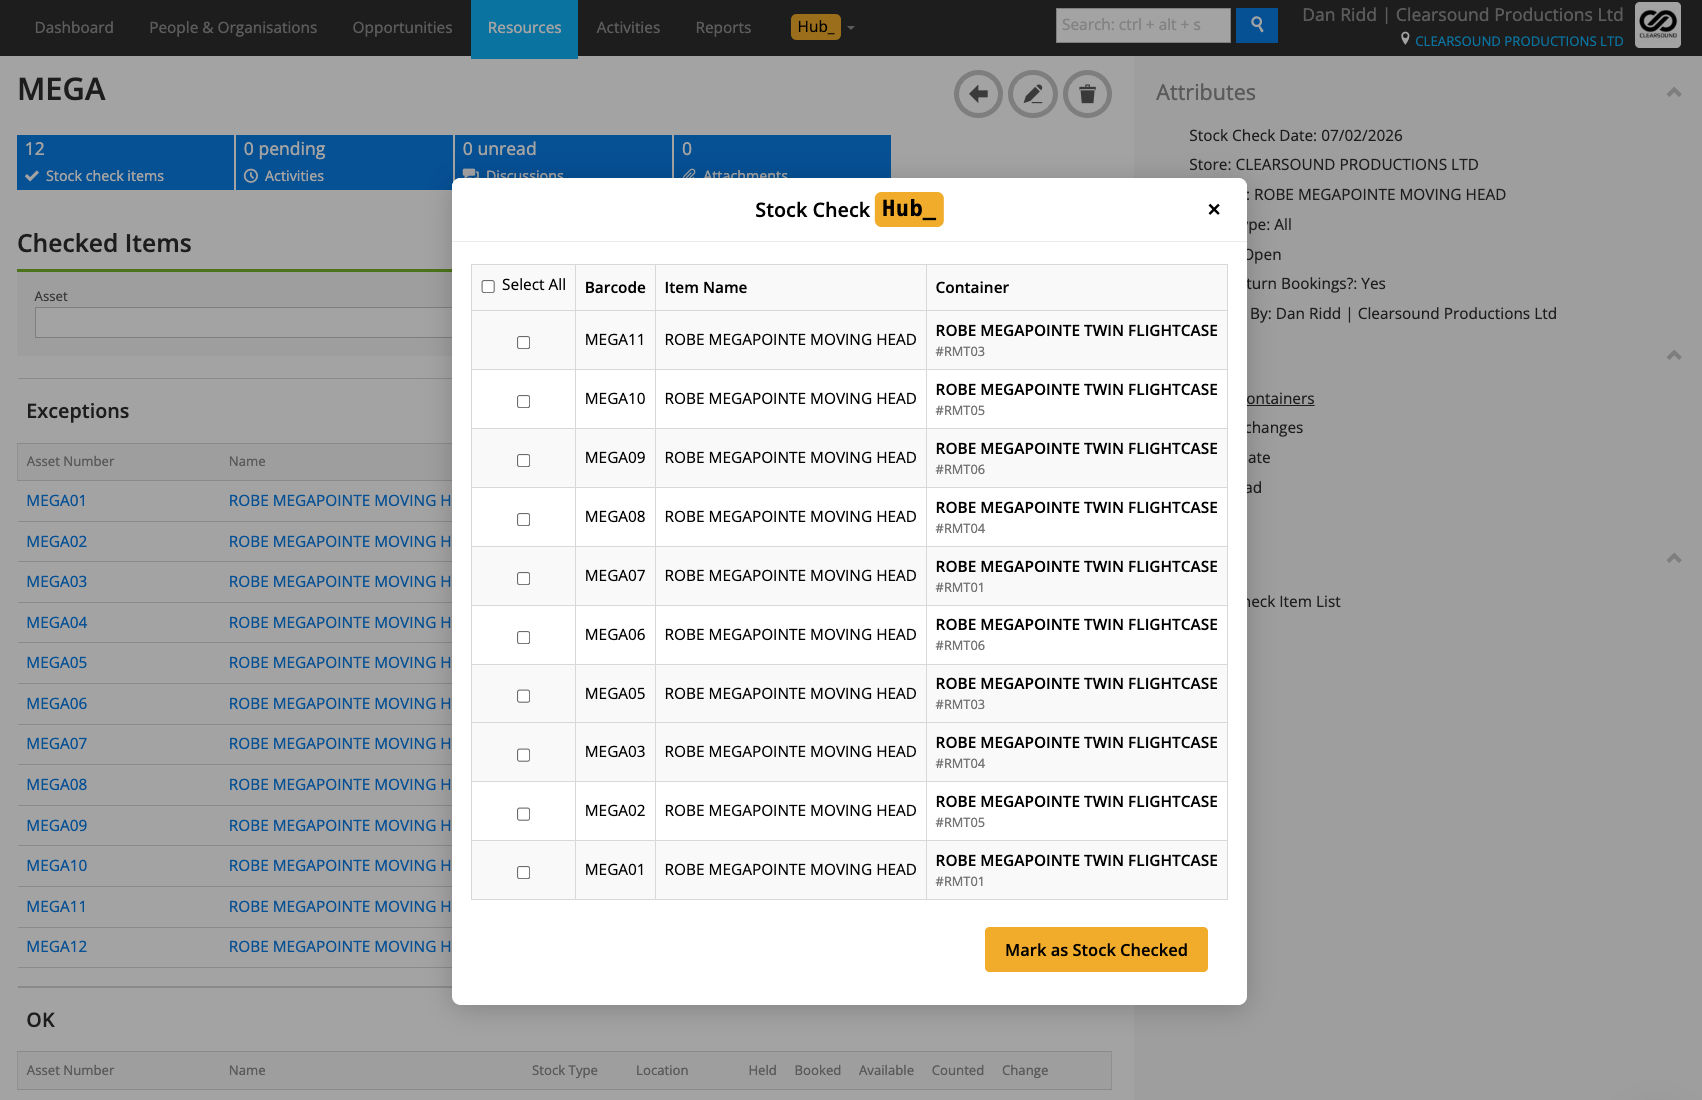
Stock Check Hub_
Clear-Up Hub_
Credit Control Hub_
Settings Hub_
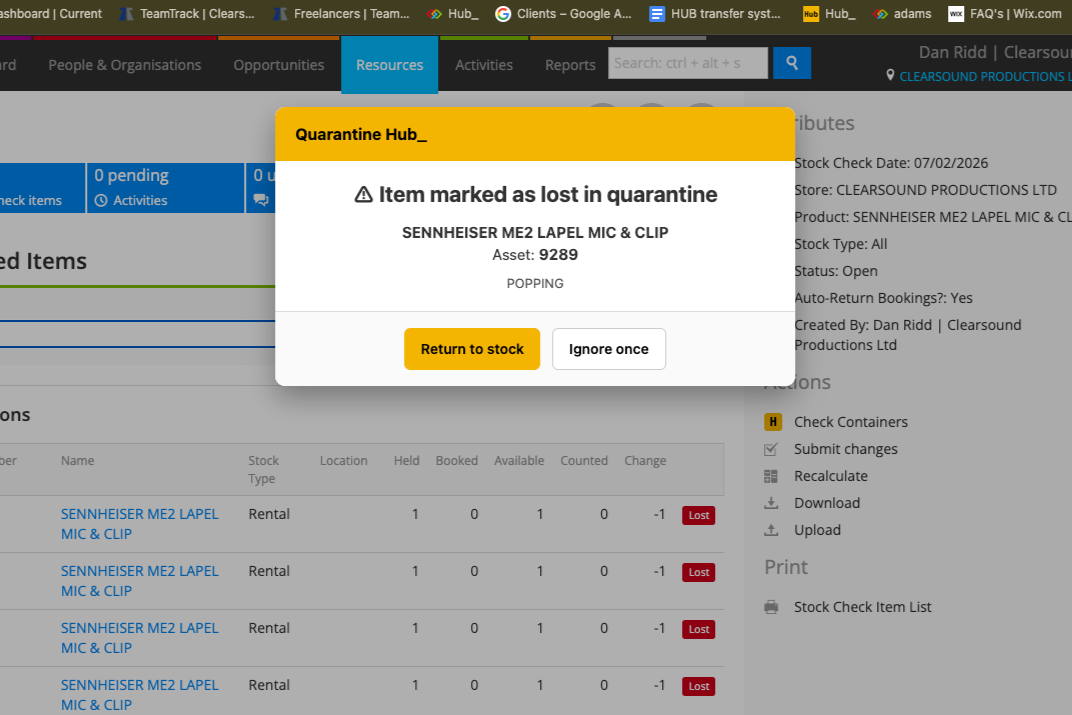
Quarantine Hub_
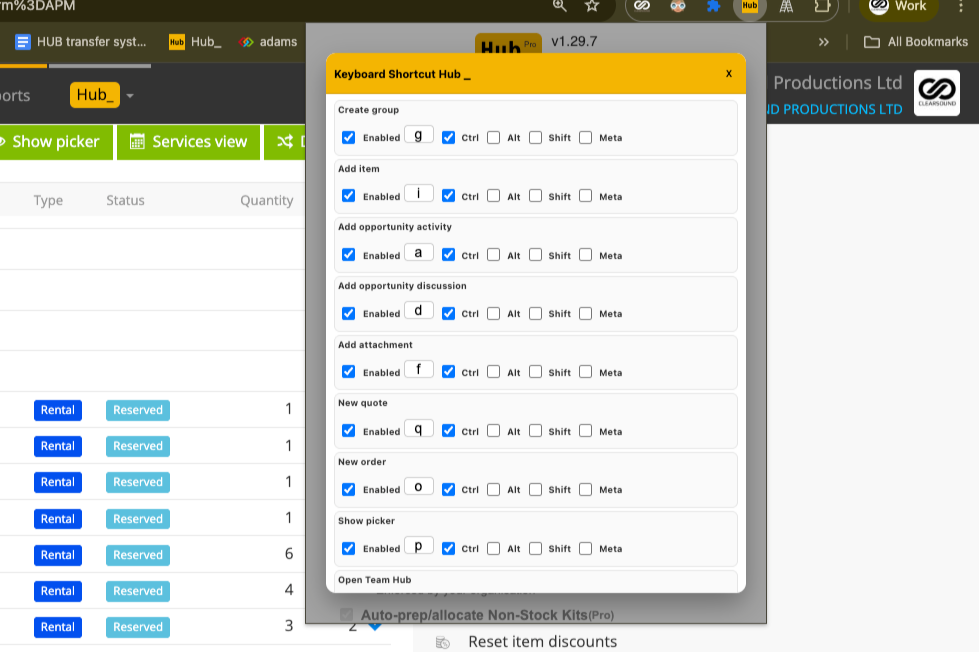
Keyboard Shortcut Hub_
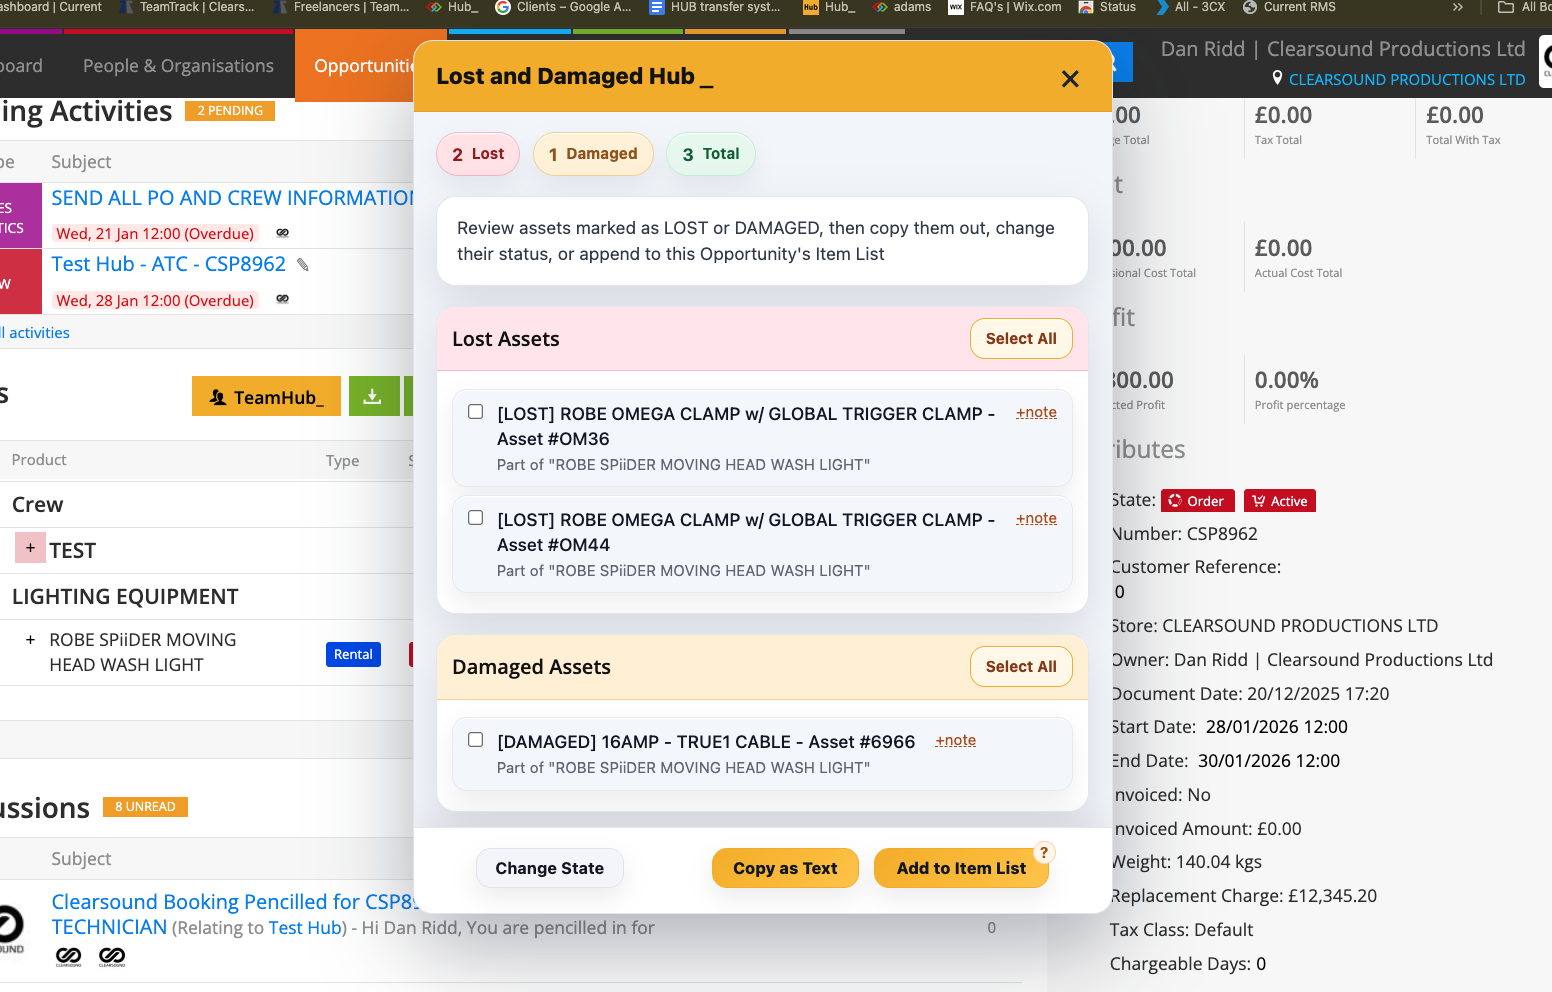
Lost & Damaged Hub_
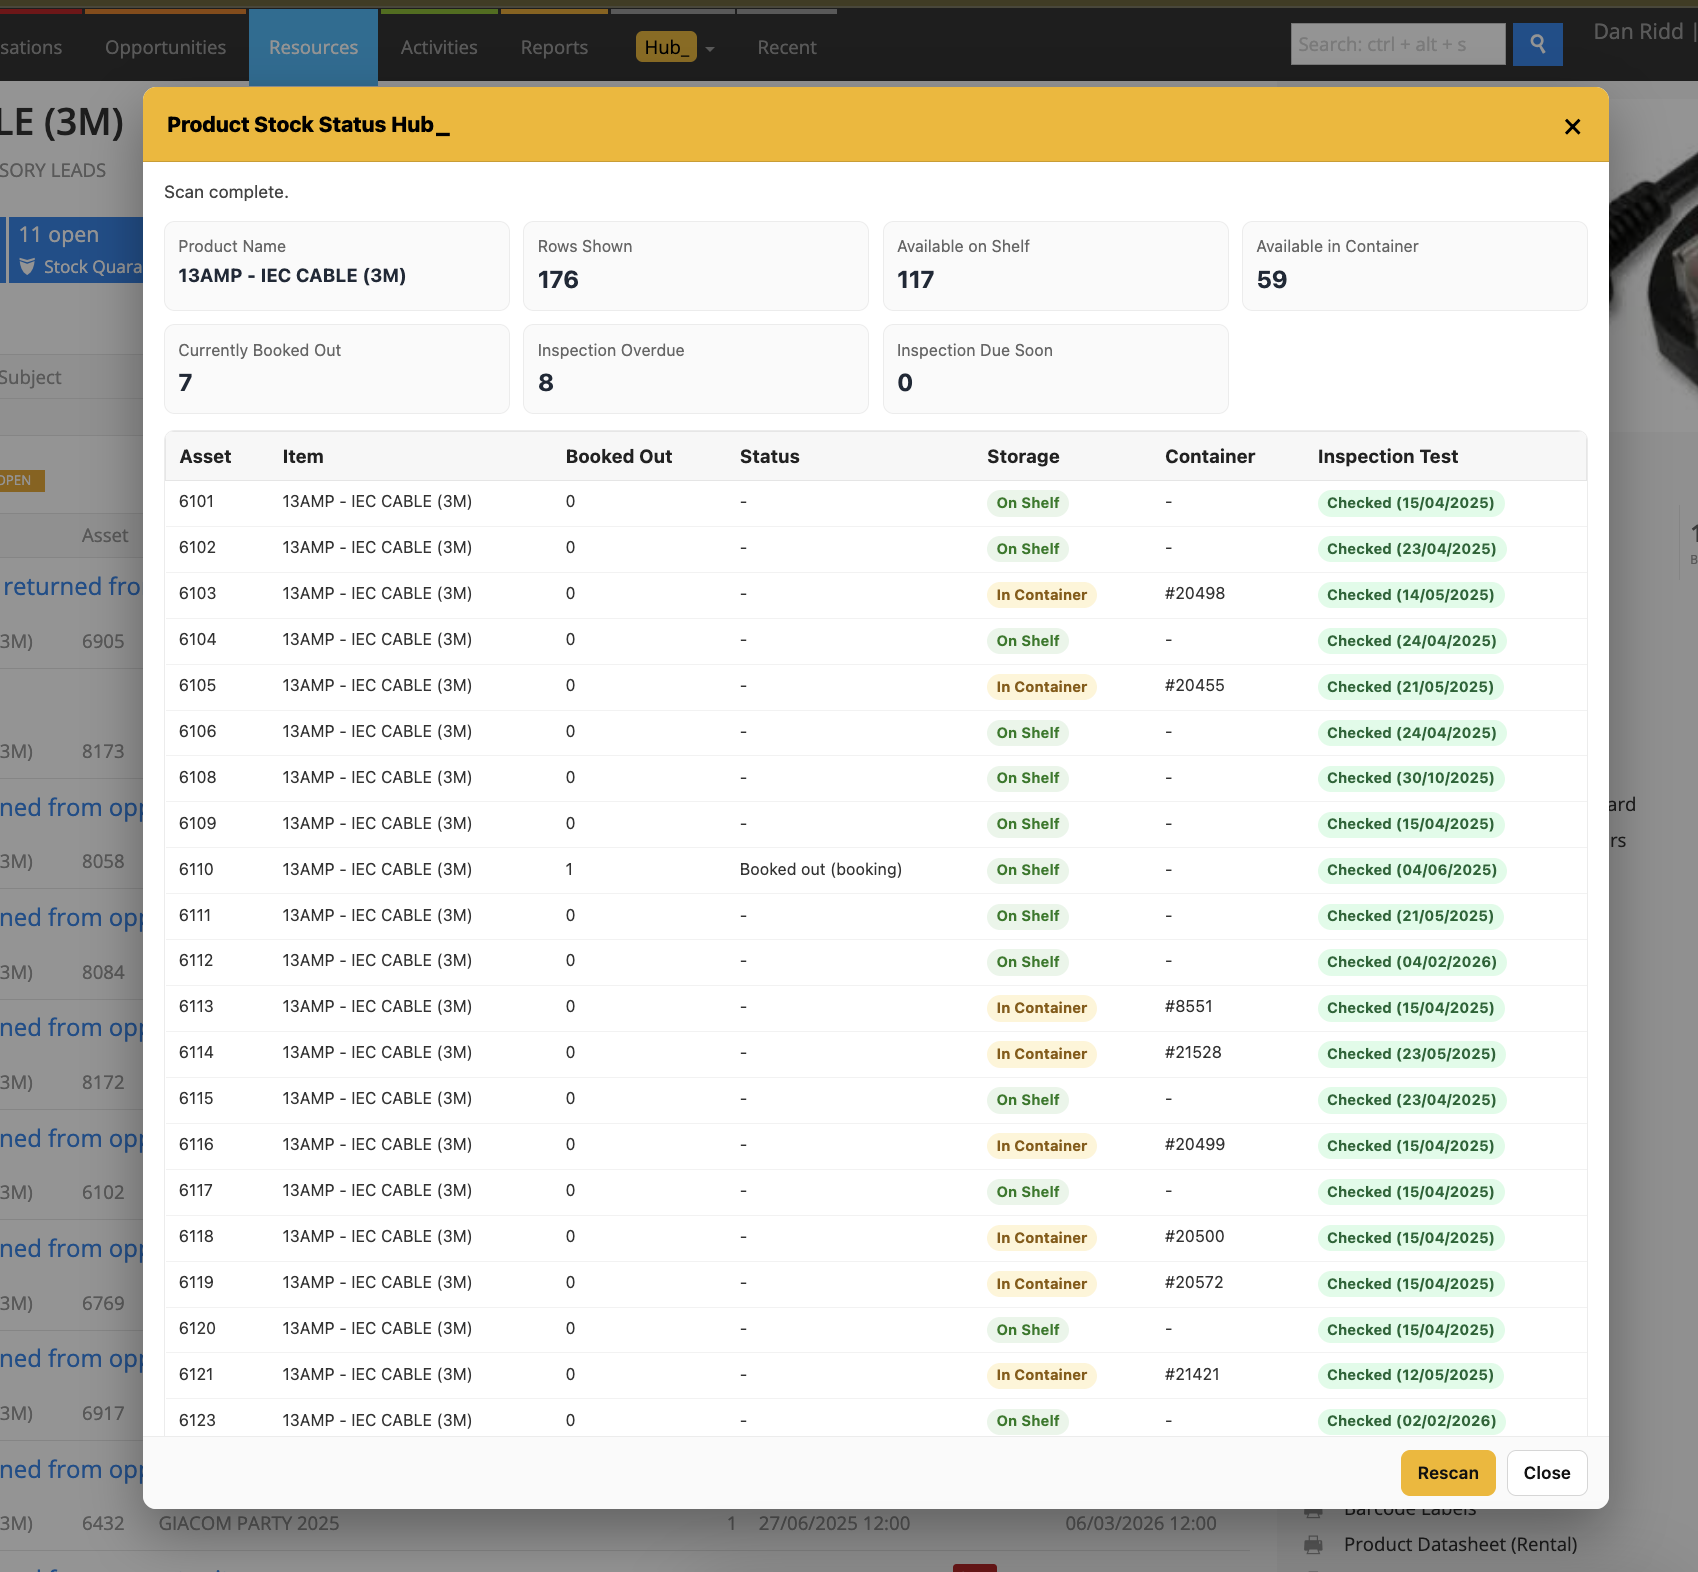
Product Stock Status Hub_